Bootstrap Theming - Responsive Slideshow in Drupal 7 with Flexslider (Part 2/3)

In this part, I'm going to start creating the responsive slideshow with the help of the Flexslider module.
The goal
Now that you have created several recipes, let’s use them along with the Flexslider module to create a block with a responsive slideshow inside.
Requirements
In order to achieve the goal, I’m going to use the following modules in addition to the ones that are part of the core:
- Ctools (Chaos tool Suite)
- Chaos tools
- Flexslider
- FlexSlider
- FlexSlider Fields
- FlexSlider Views Style
- Libraries
- Views
- Views
- Views UI
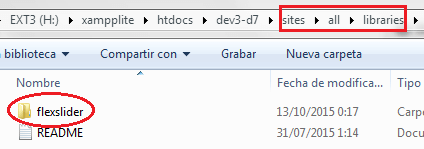
Aside from the previous modules, you must install the Flexslider library:
- Download the Flexslider library from its page on Github
- Decompress the file in the following directory location: sites / all / libraries
- Rename the folder to flexslider (pay attention to the case of the letters)
Creating a FlexSlider preset
1. Go to admin / config / media / flexslider and then click the Add link to create a new Flexslider preset.
2. Enter a human-readable title for your new option set (e.g., flexrecipe)
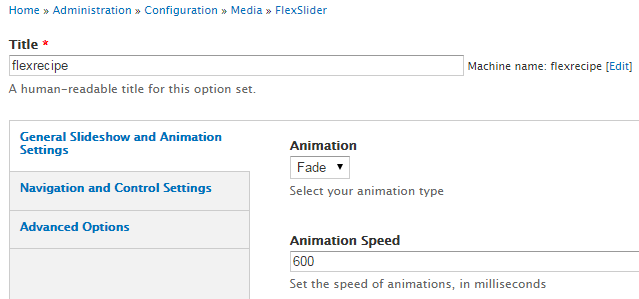
3. Fill out the HTML form for the General Slideshow and Animation Settings like this:
- Animation: Slide
- Animation Speed: 600
- Slide Direction: Horizontal
- Check the Slideshow checkbox
- Easing: Swing
- Uncheck the Smooth height checkbox
- Uncheck the Reverse checkbox
- Slideshow speed: 7000
- Check the Loop slideshow checkbox
- Uncheck the Randomize Slide Order checkbox
- Starting Slide: 0
- Item Width: 0
- Item Margin: 0
- Minimum Items: 3
- Max Items: 5
- Move: 0
4. Fill out the HTML form for the Navigation and Control Settings like this:
- Uncheck theNext/Previous Controls checkbox
- Paging Control: On
- Uncheck the Keyboard Navigation checkbox
- Uncheck the Multiple keyboard checkbox
- Uncheck the Mousewheel Navigation checkbox
- Uncheck the Smooth height checkbox
- Check the Touch checkbox
- Previous Link Text: Previous
- Next Link Text: Next
5. Fill out the HTML form for the Advanced Options like this:
- Namespace: flex-
- Selector: .slides > li
- Sync: Leave it blank
- Use as navigation: Leave it blank
- Initialize Delay: 0
- Check the Use CSS checkbox
- Uncheck the Video checkbox
- Uncheck the Add Pause/Play indicator checkbox
- Pause State Text: Pause (in order to display this value, you must check the Add Pause/Play indicator checkbox)
- Play State Text: Play (in order to display this value, you must check the Add Pause/Play indicator checkbox)
- Uncheck the Pause on Controls checkbox
- Check the Pause on Hover checkbox
- Control container (Advanced): .flex-control-nav-container
- Manual controls (Advanced): Leave it blank
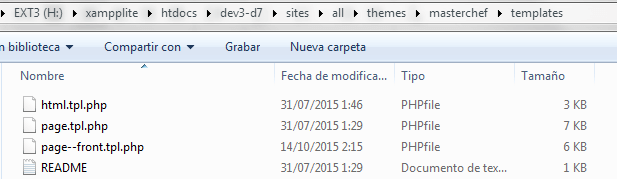
Creating a template file only for the front page
Because the slideshow will only be displayed on the front page, let’s create a custom template file instead of using the page.tpl.php file.
1. Go to sites / all / themes / masterchef / templates (masterchef is the machine name for the bootstrap subtheme with which we are working).
2. Create a new file named page--front.tpl.php and then copy all the content of page.tpl.php into it.
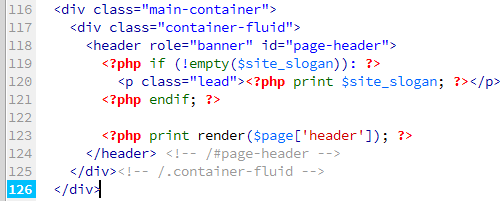
3. Open the page--front.tpl.php file with your favourite text editor or IDE and remove all the content between lines 116 and 168. Next, copy the following piece of code after the closing header tag at line 114:
<div class="main-container">
  <div class="container-fluid">
    <header role="banner" id="page-header">
      <?php if (!empty($site_slogan)): ?>
        <p class="lead"><?php print $site_slogan; ?></p>
      <?php endif; ?>

      <?php print render($page['header']); ?>
    </header> <!-- /#page-header -->
  </div><!-- /.container-fluid -->
</div>
4. From now on, the markup in this template file will only be used for rendering the front page. Do not forget to save your changes and clear all caches.
The container-fluid class is used by Bootstrap for a full width container, spanning the entire width of your viewport.
Creating a FlexSlider block with Views
1. Go to admin / structure / views and then click the Add new view link to create a new View.
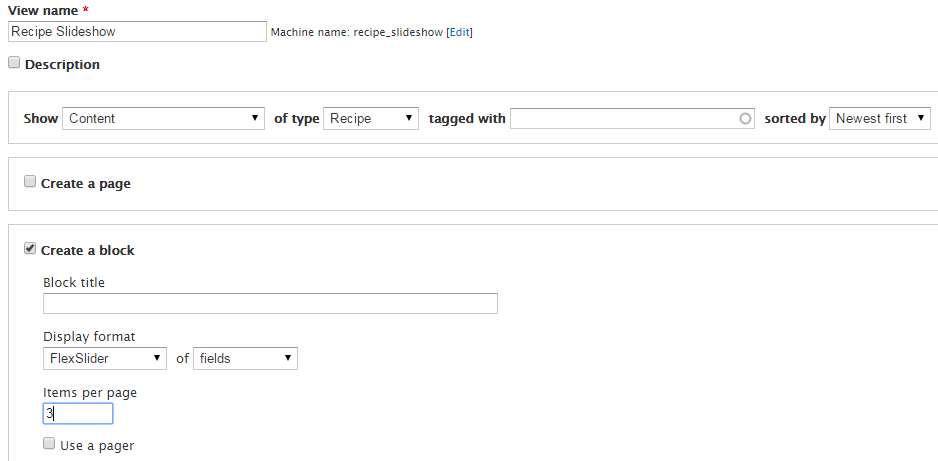
2. After clicking the Add new view link, Drupal will show you an HTML form to create the View. Fill it out like this:
- View Name: Recipe Slideshow
- Uncheck the Description checkbox (if you like, provide a description)
- Show Content of type Recipe tagged with Leave it blank sorted by Newest first
- Uncheck the Create a page checkbox
- Check the Create a block checkbox
- Block Title: Leave it blank
- Display format: Flexslider of fields
- Items per page: 3
- Do not check the Use a pager checkbox
3. Click the Continue and Edit button.
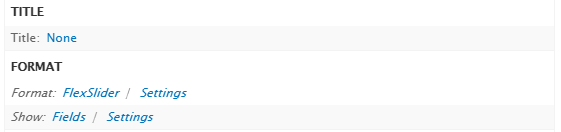
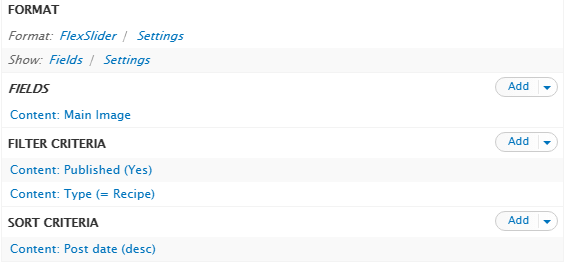
4. In the Format section, choose FlexSlider as the style to be used to format your view. Next, click the Settings link and select flexrecipe from the Option set drop-down menu in the FlexSlider section. Do not forget to apply your changes:

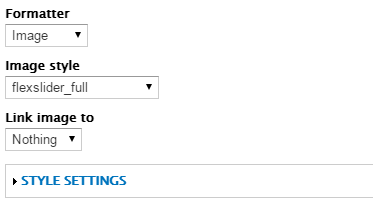
5. In the Fields section, add the Main Image field to your view. Next, click the Content: Main Image link and select flexslider_full from the Image style drop-down menu. Do not forget to apply your changes.
6. Save your view and assign this block to the top bar region at admin / structure / block.

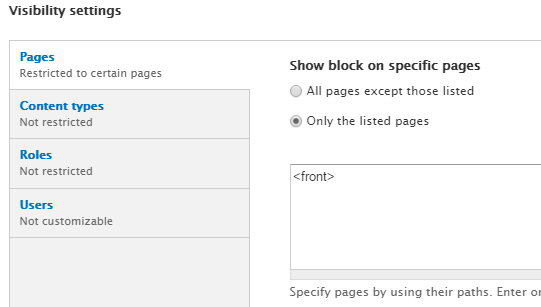
7. Click the Configure link that belongs to the View: Recipe Slideshow block and then tell Drupal to show it on the front page only.
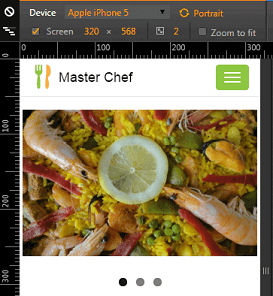
8. If everything is OK, this is how the slideshow should look at the moment: