Bootstrap Theming - Making a Responsive Grid in Drupal 7 (Part 3/4)

In this part, you are going to finish building the responsive grid that you began making in the first part of this article.
16. Go back to the Latest Recipes view and then click the Content:Title link the in the FIELDS section.
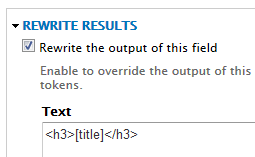
17. In the Rewrite Results section of the HTML form, tick the Rewrite the output of this field checkbox and then enter the following piece of code in the Text textarea.
<h3>[title]</h3>
There is another way to wrap the title with an h3 tag. In the STYLE SETTINGS section, tick the Customize field HTML checkbox and then select the H3 tag from the HTML element drop-down menu.
Do not forget to apply all changes.
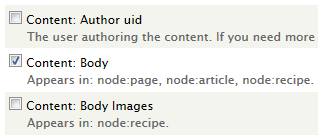
18. Click the Add button in the FIELDS section and then tick the Body field for adding it to the view.
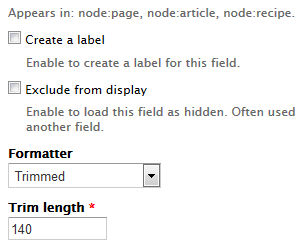
19. Fill out the HTML form like this:
- Do not tick the Create a label checkbox
- Do not tick the Exclude from display checkbox
- Formatter: Trimmed
- Trim length: 140
and ignore the other options.
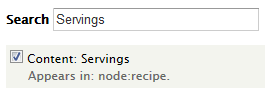
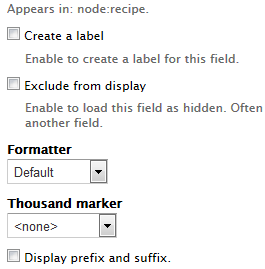
20. Click the Add button in the FIELDS section and then tick the Servings field for adding it to the view.
21. Fill out the HTML form like this:
- Do not tick the Create a label checkbox
- Do not tick the Exclude from display checkbox
- Formatter: Default
- Thousand marker: <none>
- Do not tick the Display prefix and suffix checkbox
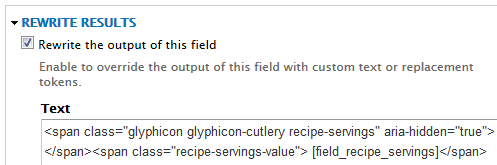
In the Rewrite Results section, tick the Rewrite the output of this field checkbox and then enter the following piece of code in the Text textarea.
<span class="glyphicon glyphicon-cutlery recipe-servings" aria-hidden="true"></span><span class="recipe-servings-value"> [field_recipe_servings]</span>
Do not forget to apply all changes.
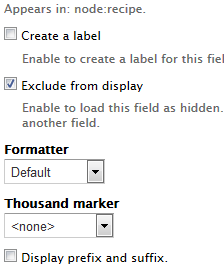
22. Click the Add button in the FIELDS section and then tick the Time field for adding it to the view.
23. Fill out the HTML form like this:
- Do not tick the Create a label checkbox
- Tick the Exclude from display checkbox
- Formatter: Default
- Thousand marker: <none>
- Do not tick the Display prefix and suffix checkbox
Ignore the other options and do not forget to apply all changes.
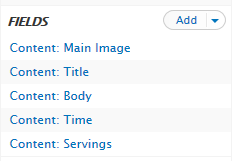
24. Rearrange the list of fields like this:
- Content: Main Image
- Content: Title
- Content: Body
- Content: Time
- Content: Servings
25. Click again the Content: Servings link and go to the Rewrite Results section. In the Text textarea, enter this new piece of code:
<span class="glyphicon glyphicon-cutlery recipe-servings" aria-hidden="true"></span><span class="recipe-servings-value"> [field_recipe_servings] servings</span><span class="glyphicon glyphicon-time recipe-time" aria-hidden="true"></span><span class="recipe-time-value"> [field_recipe_time] min</span>

Do not forget to apply all changes and save the view.
26. Now if you check out your view, it should look like this:
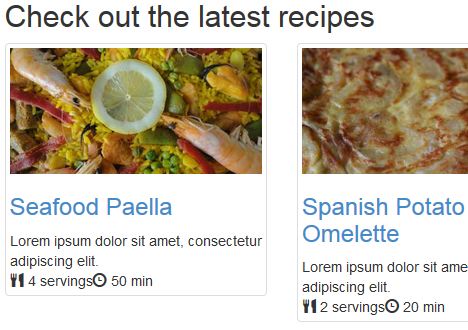
As you can see in the previous figure, the responsive grid is finished. Because it looks pretty bad, let's use CSS to make it look good!