Bootstrap Theming - How to make a fat footer (Part 1/2)

In this article (the last one of this series), you are going to make a fat footer, that is, a footer that is not limited to contain a few basic details about the copyright, authorship, etc. of your website.
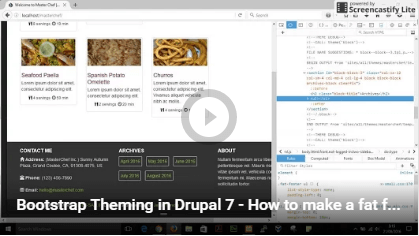
Demonstration video
Please, click on the image below to open a modal window with a video showing the end result of this article.
Download the source code
Site: masterchef_site.zip
Database: masterchef_db.zip
Username: admin | Password: 123456
Getting started
A footer always contains information about its section such as who wrote it, links to related documents, copyright data, etc. Therefore, what happens when your web design uses a fat footer, that is, a footer that contains images, advertisements, social media buttons... in addition to the basic details mentioned above. In other words, how do you approach the design of a footer when almost a whole front page is placed in it?
Creating the blocks and regions
In order for a fat footer to have a right HTML structure, the content of the standard footer must be separated from the extra content you will add to the footer. In addition, you can use the aside tag to clearly define that the extra content is another section tangentially related to the content of the page.
1. Go to the block region demonstration page of your bootstrap subtheme and check if there is a region to contain the extra content of the fat footer. Unfortunately, there is not any appropriate region in the case you are working with, so that let's create a new region named, for example, Extra Footer.

2. To create a new region, open the masterchef.info file and add the following piece of code to the Regions section. When you have finished, remember to save all changes to the file and clear all caches.
regions[extra_footer] = " Extra Footer"
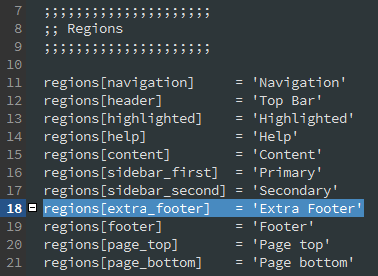
3. Go to admin / structure / block and check that the Extra Footer region has been successfully created.
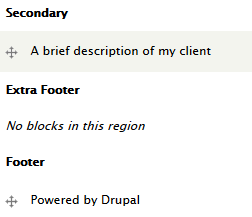
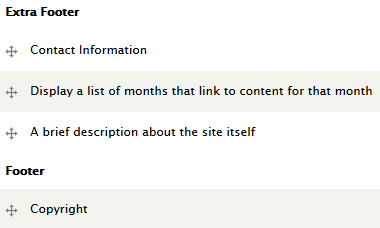
4. Create three new blocks (e.g., Contact me, Archives, and About) and place them in the Extra Footer region. In addition, take out the Powered by Drupal block from the Footer region by selecting None from the drop-down menu available for this block. Likewise, create two others blocks (e.g., Copyright, and Social buttons) and put them in the Footer region.
Making the HTML structure
Now that the Extra Footer region is available to be used, let's start coding the fat footer in the page--front.tpl.php file.
Go to the last line of the file, press Enter, and then paste the following piece of code into it:
<div class="fat-footer" id="fat-footer">
  <aside class="extra-footer" id="extra-footer">
    <div class="container"><!-- responsive fixed width container -->
      <div class="row">
        <?php print render($page['extra_footer']); ?>
      </div><!-- /.row -->
    </div><!-- /.container -->
  </aside>

  <footer class="standard-footer" id="standard-footer">
    <div class="container"><!-- responsive fixed width container -->
      <div class="row">
        <?php print render($page['footer']); ?>
      </div><!-- /.row -->
    </div><!-- /.container -->
  </footer>
</div><!-- /.fat-footer -->
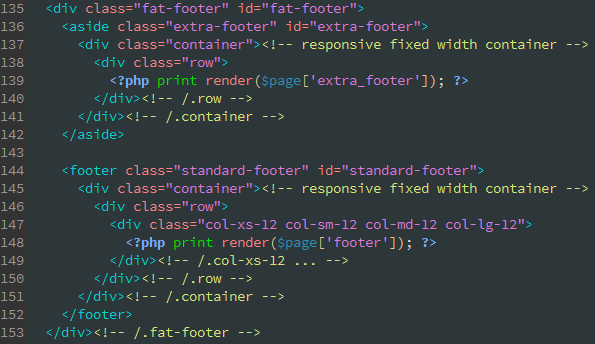
Because there is a lot of tags inside the div tag with the id of fat footer, let's have a closer look at each in order to fully understand how this piece of code works.
As stated above, the content of the standard footer must be separated from the extra content. That is exactly what you are doing here.
First, you are using the footer tag (line 144) to contain some basic information about copyright and a few social media buttons.
Second, you are using the aside tag to contain the extra content (Contact me, Archives, and About) and separate it from the content of the standard footer.
The contact information for the author or editor of a section belongs in an address element. If you like, you can also put the contact information in the Footer region. A footer tag should contain information about its containing element and it normally contains information about authorship, copyright, contact, and the like. If you want to add a piece of code for displaying content coming from another site (e.g., Twitter), then use the aside tag of the fat footer.
Third, you are also using a responsive fixed width container with both pieces of content Later on, you will set the width of each block placed in these regions.
Finally, the div tag with the id of fat-footer is containing both the aside and footer tags, conforming what is called a fat footer.
Adding the bootstrap classes to the blocks placed in the Extra Footer region
Now if you clear all caches and refresh the home page, the fat footer should look like this:

As expected, each block placed in the Extra Footer region is stacking on top of each other for all viewports. This arrangement is suitable for extra small devices, but, obviously, it is not for small, medium, and big devices. In order to properly arrange the blocks placed in this region, you must set an appropriate width to each of them by adding the right bootstrap classes to their HTML markup.
1. Go back to your browser window and inspect the HTML code for the blocks in the Extra Footer region.
2. As you can see in the following image, there are several template files you can use to edit these blocks.
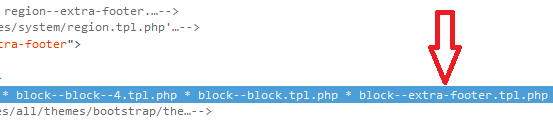
Because you are going to set the same width for every block in this region, the best file name suggestion is block--extra-footer.tpl.php.
3. Copy the block.tpl.php file located at sites / all / themes /bootstrap / theme / block into the templates folder of your bootstrap subtheme and then rename it to block--extra-footer.tpl.php.

4. Open the block--extra-footer.tpl.php file with your favourite text editor or IDE and add the following bootstrap classes to the section tag (line 48): col-xs-12 col-sm-4 col-md-4 col-lg-4. Remember to save all changes to the file and clear all caches.
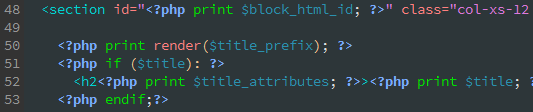
You can omit the col-md-4 col-lg-4 classes. They have been added to the code just for added clarity.
As you can guess, col-xs-12 col-sm-4 makes that the blocks placed in the Extra Footer region are on top of each other for extra small viewports, and next to each other (spanning four columns each) for small, medium, and large viewports.
5. Now, if you go to the home page, you will see that the blocks placed in the Extra Footer region are placed just as you dictated in the previous step.


As you can guess, you must also add the bootstrap classes to the blocks placed in the Footer region. This time, instead of using a template file, let's use the CSS class(es) field provided by the Block Class module you installed in the previous article. Add col-xs-12 col-sm-8 col-md-8 col-lg-8 to the Copyright block and col-xs-12 col-sm-4 col-md-4 col-lg-4 to the Social buttons block.
Creating a cleaner and easier to read home page template
From the beginning of this series, you have been adding the markup for all regions to the page--front.tpl.php file. Although this approach works, it is better to be as specific as possible when creating any template file. In the case you are working on, you can take advantage of the region.tpl.php file to create a cleaner and easier to read homepage template.
Let’s make an example of it by removing part of the code for the fat footer from the page--front.tpl.php file.
1. Copy the region.tpl.php file located at modules / system and paste it into the templates folder of your bootstrap subtheme.
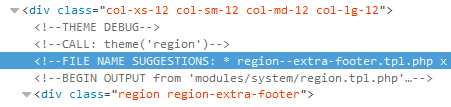
2. Go to the homepage and inspect the code for the Extra Footer region by using the developer tools of your favourite browser.
3. Use the FILE NAME SUGGESTIONS to find a proper template file for editing the Extra Footer region (region--extra-footer.tpl.php).
4. Rename the region.tpl.php file in your templates folder to region--extra-footer.tpl.php.

5. Open the page--front.tpl.php file with your favourite text editor or IDE and replace the following piece of code:
<aside class="extra-footer" id="extra-footer">
  <div class="container">
    <div class="row">
      <?php print render($page['extra_footer']); ?>
    </div><!-- /.row -->
  </div><!-- /.container -->
</aside>
with:
<?php print render($page['extra_footer']); ?>

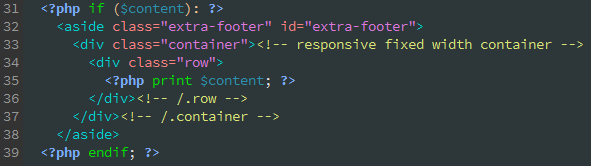
6. Finally, replace the default theme implementation in the region--extra-footer.tpl.php file with the following piece of code:
<?php if ($content): ?>
  <aside class="extra-footer" id="extra-footer">
    <div class="container"><!-- responsive fixed width container -->
      <div class="row">
        <?php print $content; ?>
      </div><!-- /.row -->
    </div><!-- /.container -->
  </aside>
<?php endif; ?>
Remember to save all changes to both files and clear all caches.
Now if you refresh the homepage and inspect the HTML code for the Extra Footer region , you will see that the region--extra-footer.tpl.php file is being used to output the content in the Extra Footer region.
