Practical Drupal Development #5 - How to create tabbed content combining Quick Tabs, Views and Nodequeue

This is the episode number 5 of Practical Drupal Development. This time I'm going to show you how to create tabbed content for Drupal 7. As always, I'm going to pose a practical issue in order to help you understand how it's made.
Issue to be solved
Tabbed content is a great way of making an intelligent use of space for displaying pieces of content related each other. One of your clients, who owns a newspaper on the Internet, must create a new block every time a different piece of information is needed. The goal is to make use of tabbed content for displaying, on the frontpage, three pieces of information in just one block: latest, most commented and most viewed articles.
Modules to be installed
In order to create this container block, we'll use the following modules in addition to the ones that are part of the core:
- Ctools (Chaos tools)
- Devel (Devel, Devel generate)
- Quick Tabs (Quicktabs, Quicktabs Style)
- Nodequeue (Nodequeue)
- Views (Views, Views UI)
The Devel module will be used just to generate dummy content.
Creating the first tab - Latest Articles
Latest Articles is the piece of information to be displayed by the first tab of the block. Although you could use the Recent content block to display that type of information, you are going to create a new View due to the fact that you do not want the username field to be displayed along with the article name.
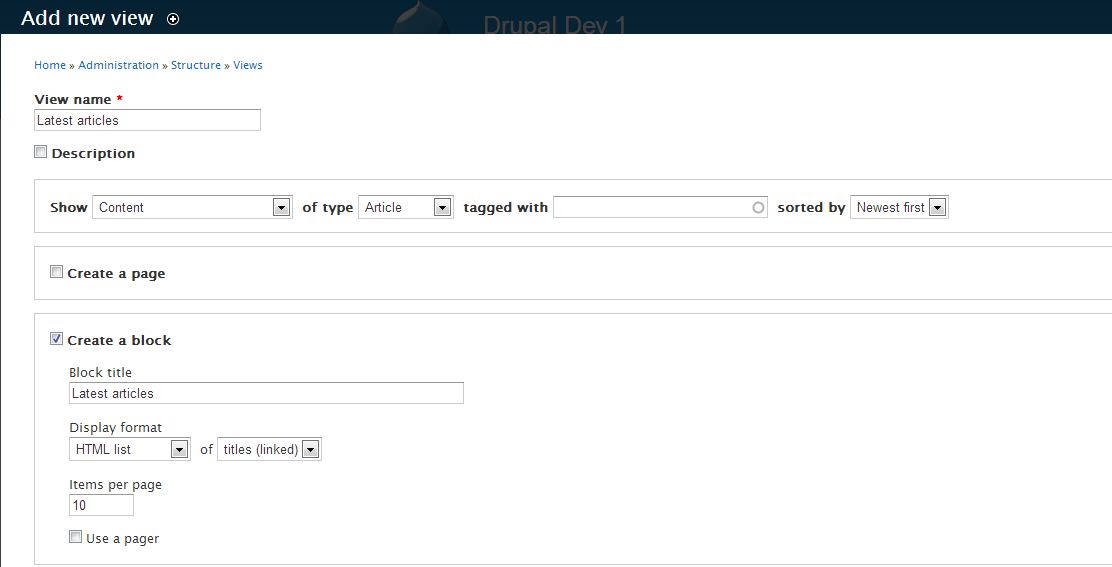
Please go to admin/structure/views and click on the Add a new view link. Next, fill out the form with the following values:
- View name: Latest articles
- Show Content of type Article sorted by Newest first
- Uncheck the Create a page checkbox
- Check the Create a block checkbox
- Block title: Latest articles
- Display format: HTML List of titles (linked)
- Items per page: 10
Finally, click on the Continue and Edit button.
Click on the images to make them bigger.
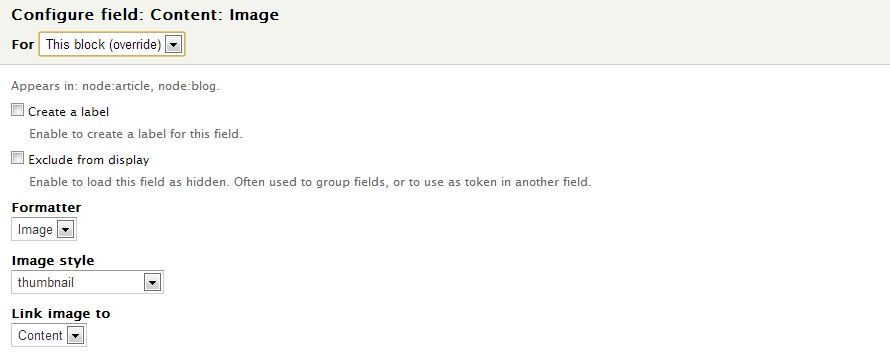
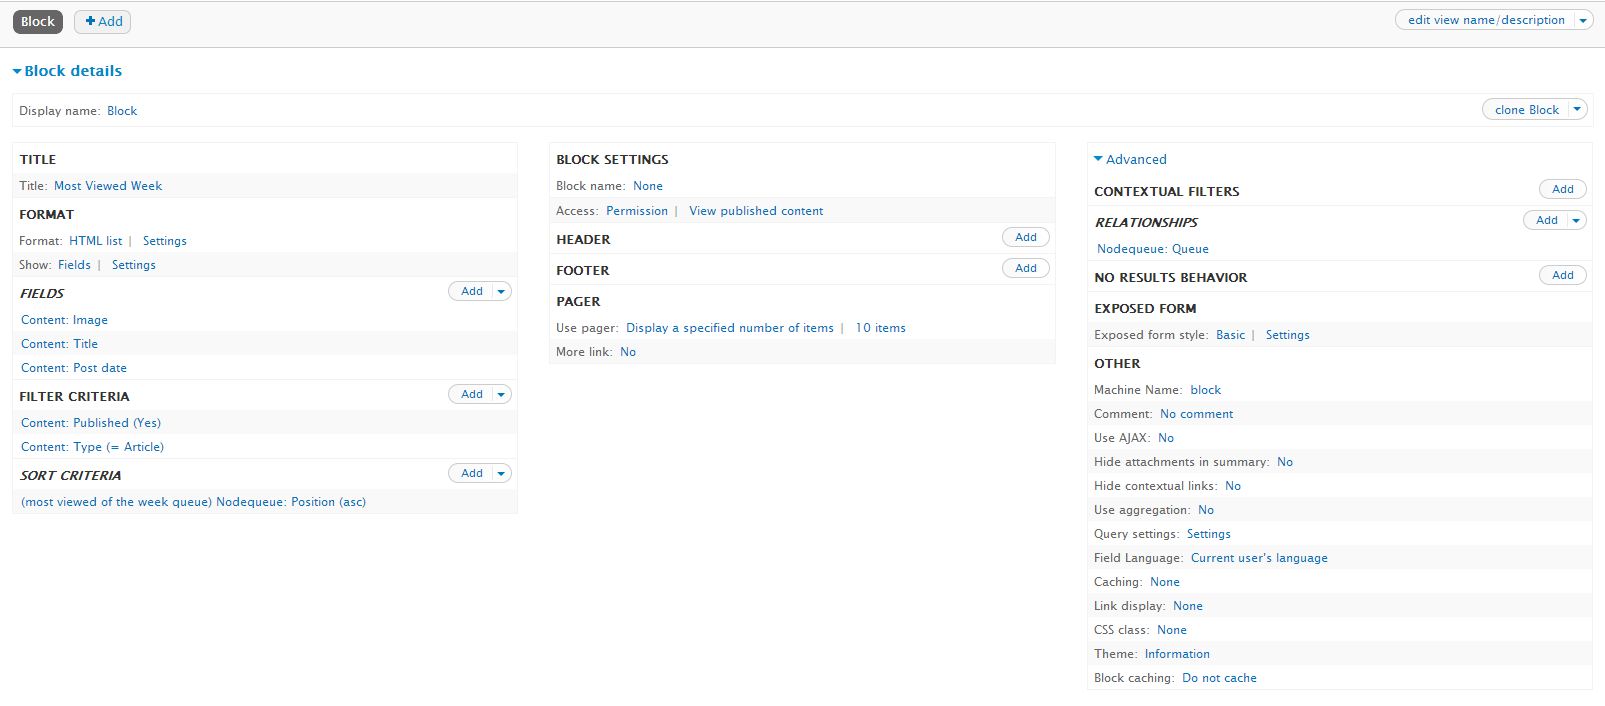
Now you have to edit and save the View. Although you could change a lot of settings on this page, you just need to add three fields to the block (Image, Title and Post date), as you can see in the following image.
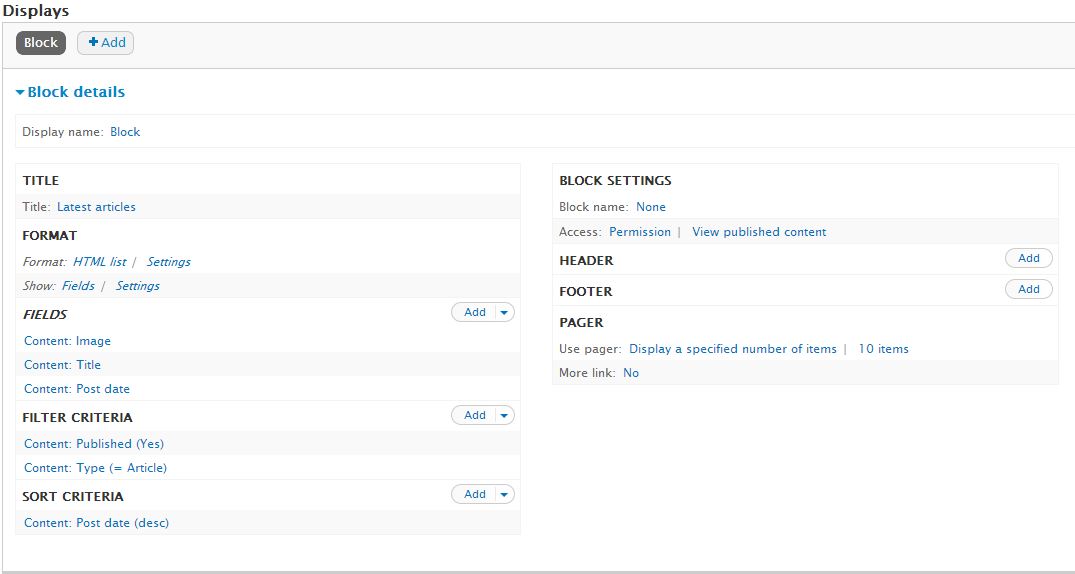
Since you have included the Image field in the block, it's important to select thumbnails as the Image Style in order to not include the original image but a resized version of 75px height by 100px width.
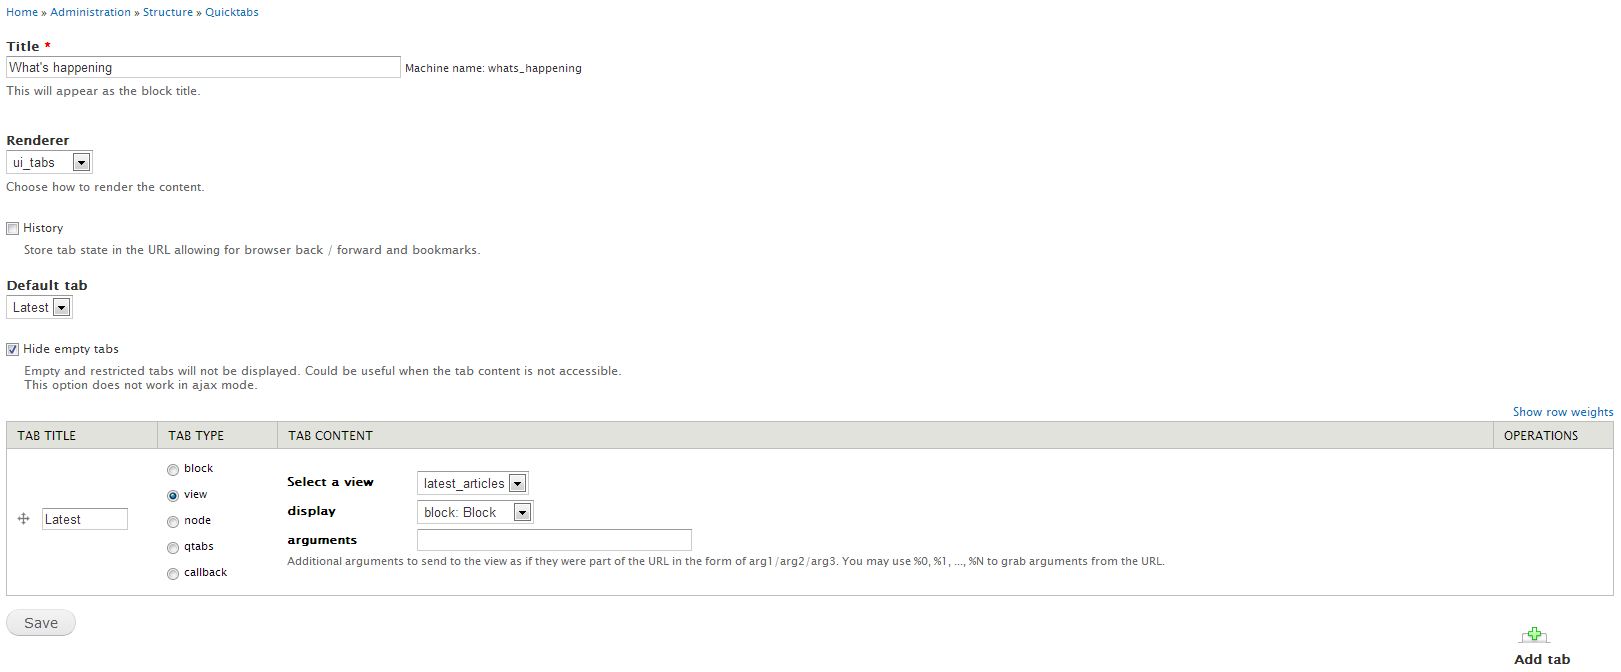
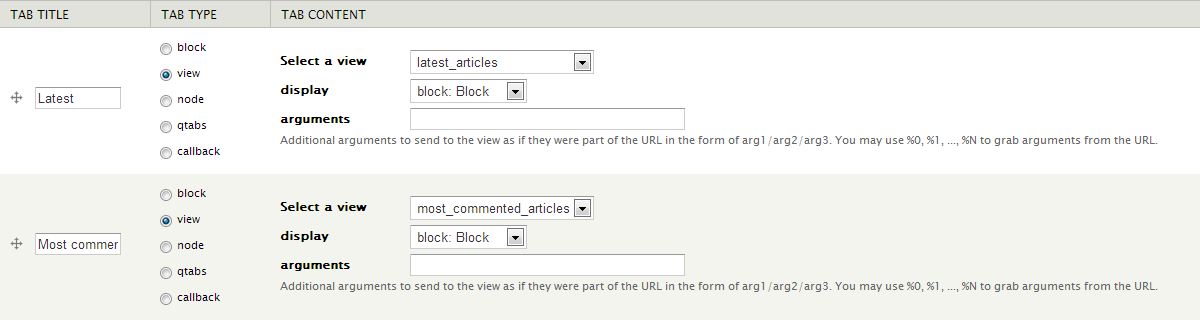
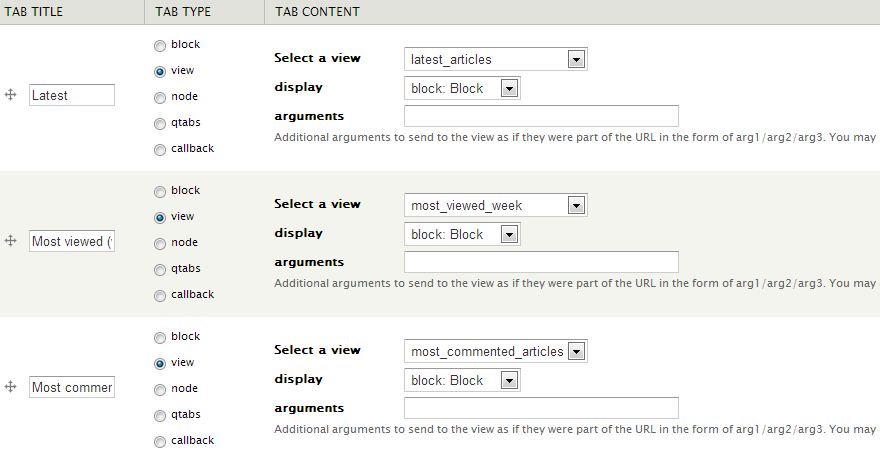
Now you have to link the previous block to the first tab of the container block. To do so, go to admin/structure/quicktabs and click on Add Quicktabs instance. Next, fill out the form with the following values:
- Title: This will appear as the block title.
- Renderer: Choose how to render the content. Select ui_tabs from the drop-down menu.
- Uncheck the History checkbox.
- Default Tab: The tab name by default. At the bottom of the form, there is a tool that allows you to create as many tabs as you want. The default tab will be named Latest.
- Check the Hide empty tabs checkbox.
- Create a tab to be named Latest and link it to the View with the name Latest articles.
- Do not forget to save the instance.
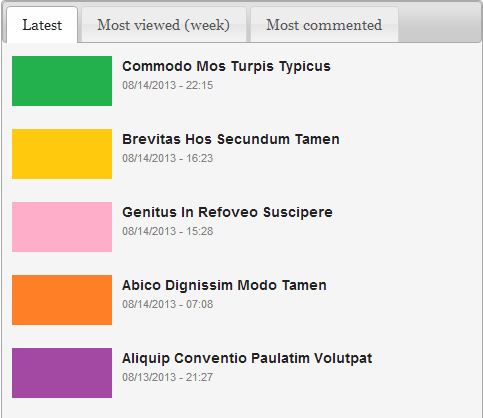
You have already created the first tab of the block, which looks like as follows:
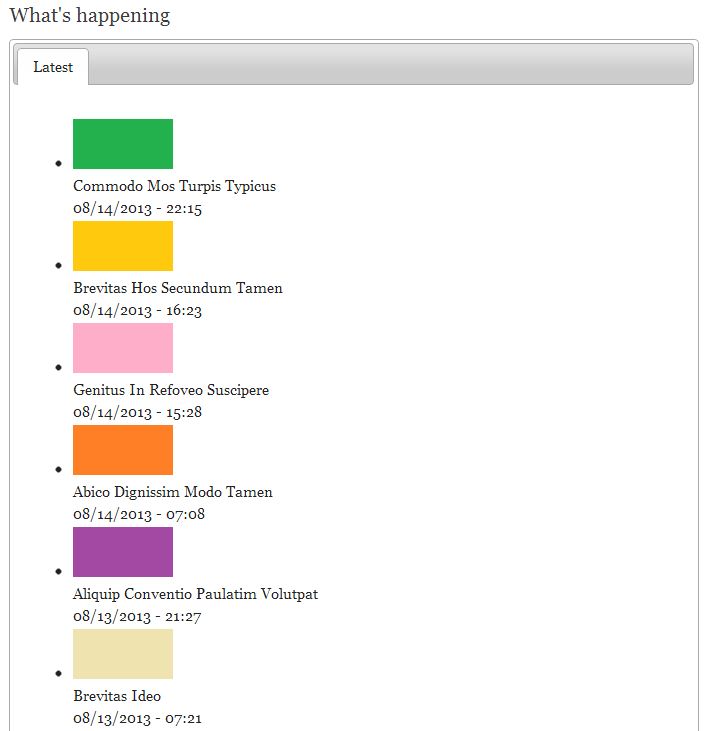
Didn't the unordered list make a big impression on you? Don't worry very much about it. Once you create the three tabs, you'll use the power of CSS to make the unordered lists look great!
Creating the second tab - Most Commented Articles
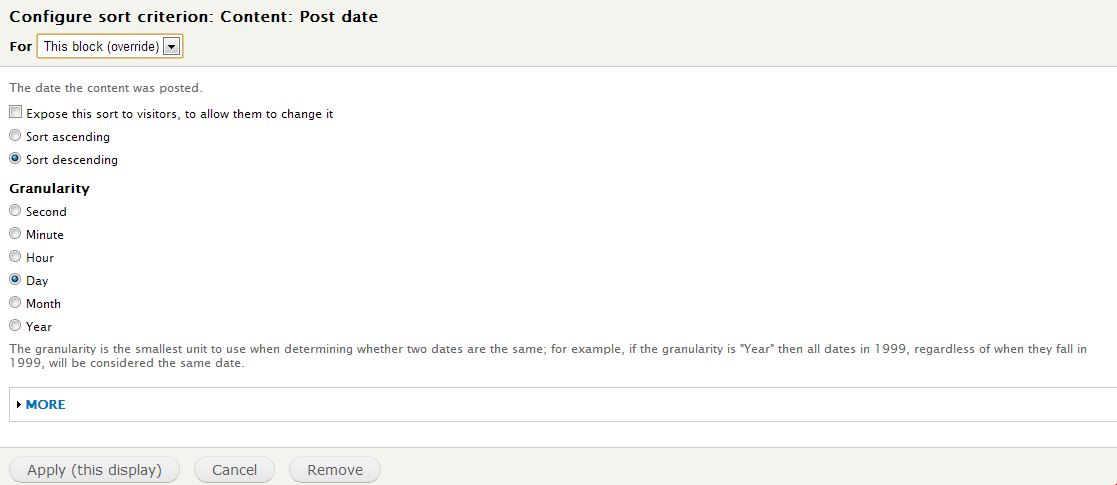
OK, now we are going to go ahead and create the second View for the most commented articles. This tab will contain a list of articles sorted by the number of comments each article has. If the number of comments between two articles is the same, then a second sort criterion will be used: the Content: Post Date (desc) with a granularity of day. This means that all the articles written at the same day (regardless of hours, minutes and seconds) are considered the same.
For example, if two articles have the same number of comments, but one of them has been written one day earlier than the other, then that article will appear first in the unordered list. This way visitors to the page can have a quick look at those articles that provoked more controversy among readers
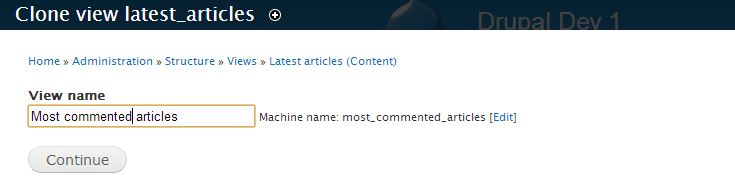
Since this View is pretty much the same as the previous one (the View for the first tab), you would save time if you were able to create a copy of the first View and add just the new stuff to it. You can do that by using an operation called clone. Please click on the drop-down menu related to the Latest articles View and select 'clone'. Next enter a name for the new View and click the Continue button.
As you can see, the new View is created and added to the Views table.

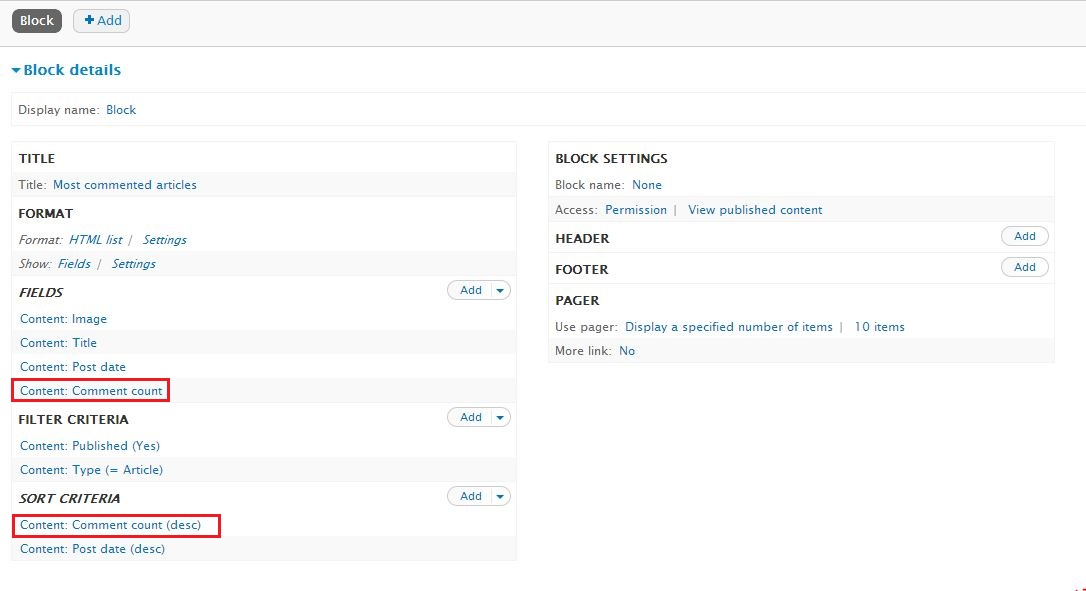
Now you have to edit the new View and add the new stuff to it. As said earlier, the list of articles is sorted by the number of comments each article has. This is going to be the main sort criterion for this view. In addition, you need to add a new field in order for the visitors to know the number of comments every article has. Please have a look at the following two images:
Now you must link this new view to the second tab of the block. The process is the same as for the first tab.
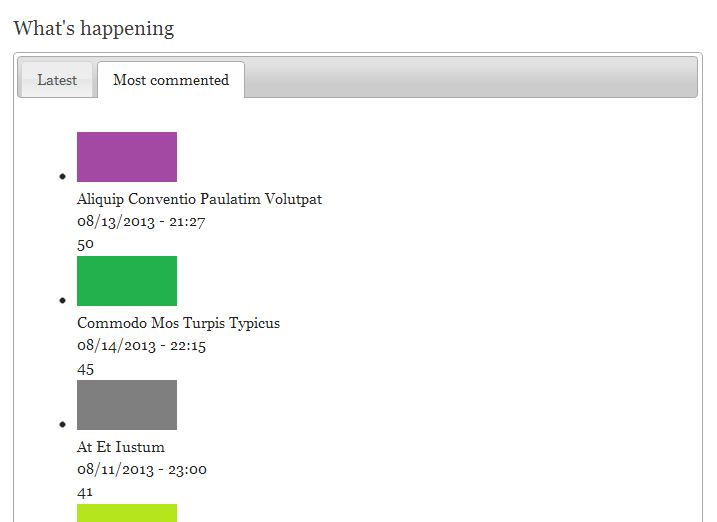
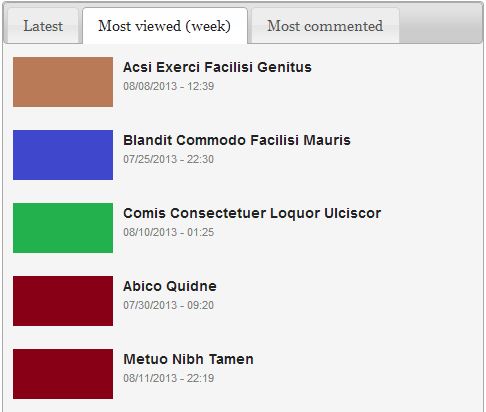
And this is the result:
Creating the third tab - Most Viewed Articles of the Week
The third tab will contain a list of the ten most important nodes/articles based upon your website statistics. In order to do so, you need a way of creating a list to which you can add nodes arbitrarily. The Nodequeue module comes in handy to do that.
It's your responsibility to decide the granularity for the sort criterion to be used with the queue created by the Nodequeue module. You might, for example, create a list of the most viewed articles of the day, week or month.
Because you don't have any website statistics at this moment, you'll add ten nodes at random to the queue created by the Nodequeue module. Next, you'll link this queue to the third tab of the container block.
In real life, those nodes would match the ten most visited articles of the day, week or month according to our statistics.
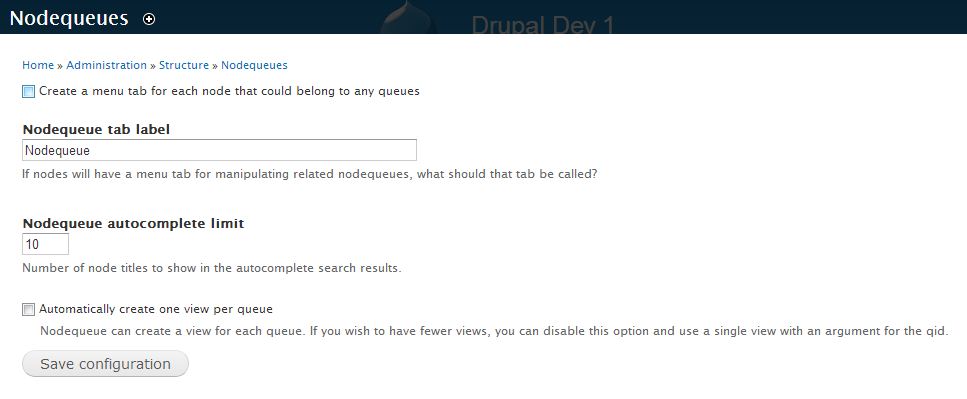
Before you get started with the third View, you must adjust the Nodequeue module settings. Go to the settings page and fill out the form with the following values:
- Uncheck Create a menu tab for each node that could belong to any queues.
- Ignore the input box labeled as Nodequeue tab label.
- Ignore the input box labeled as Nodequeue autocomplete limit.
- Uncheck Automatically create one view for queue.
Click the Save Configuration button.
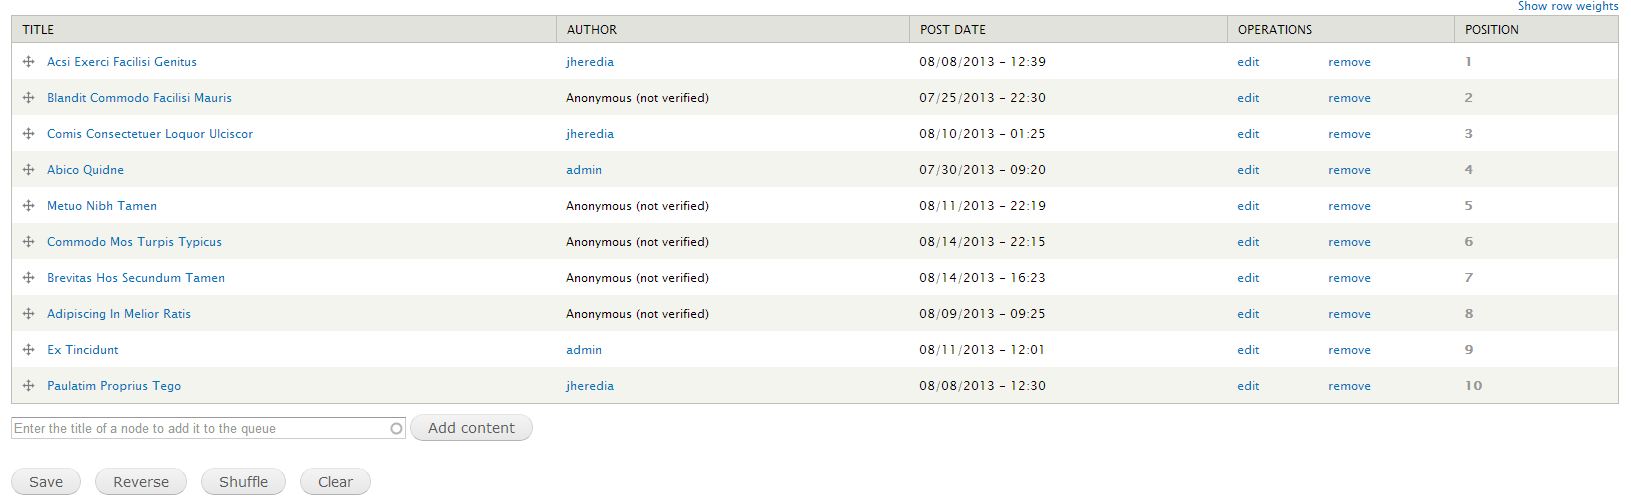
Now go to admin/structure/nodequeue and click on Add Simple Queue. Again, fill out the form with the following values:
- Title: Most Viewed Week
- Types: Article
You can ignore the other options. Finally click the Submit button.

As you can see in the previous image, every queue has three types of operations (View, Edit and Delete). Now you have to click on the View link related to the Most Viewed Week queue to start adding nodes to the queue. As said above, you are going to create a list of the ten most viewed nodes/articles of the week. This ranking is always according to your website statistics.
The first node added to the queue will be the last in the list, so in order to create a proper list of nodes, the number ten in the ranking must be added first to the list. Next, you must add the number nine and so on.
Now you have to create a new View (Most Viewed of the Week) and add a relationship to a nodequeue to it. This is of primary importance in order to display just those nodes you added to the Most Viewed Week queue.
As you did for the previous views, go to admin/structure/views and click on Add a new view. Next, fill out the form with the following values:
- View name: Most Viewed of the Week
- Show Content of type Article sorted by Unsorted
- Uncheck the Create a page checkbox.
- Check the Create a block checkbox.
- Block title: Most Viewed Week
- Display format: HTML List of titles (linked)
- Items per page: 10
Finally, click the Continue and Edit button.
OK, it's time to do the magic tricks for this new View, which is a little more complex than the previous ones.
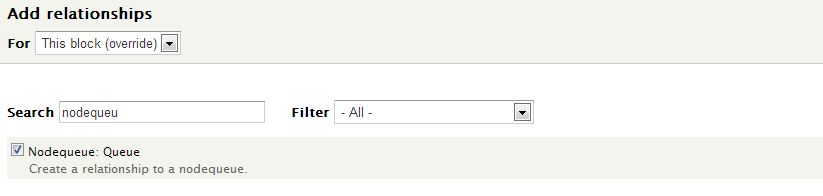
First of all, you have to add a relationship to a nodequeue. In order to do so, you have to click the Advanced link located to the right of the Block Settings column. Next, click Add on the drop-down menu related to the Relationships region.
Now, type nodequeue into the Search Box provided by the modal window and select the following result: Nodequeue: Queue. Create a relationship to a nodequeue.
Finally, click on the Apply button. The following image shows the option to be checked:
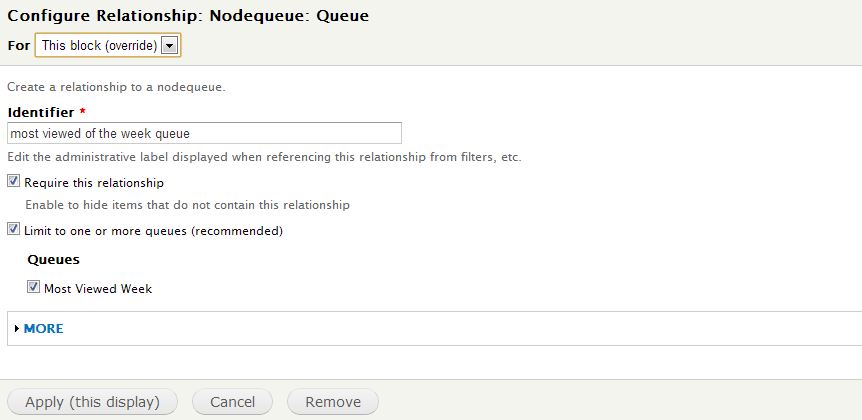
Once the relationship has been created, a new modal window with the title of Configure Relationship: Nodequeue: Queue pops up. Here, you have to type an identifier into the input box (most viewed of the week queue) and check the three available checkboxes: Require this relationship; Limit to one or more queues (recommended) and Most Viewed Week (the queue that you have just created). You can see it in the following image:
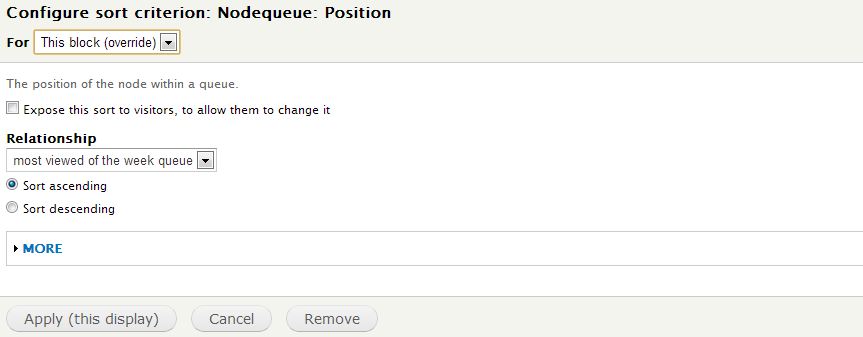
Now you have to add a sort criterion that allows the View to display the Most Viewed Week queue's items just as they were added in the previous step. This sort criterion is called Nodequeue: Position, so add it to the view and fill out the form for its configuration as follows:
- Relationship: most viewed of the week queue
- Check the Sort ascending checkbox.
- You can ignore the other options.
Finally, add the Image, Title and Post date fields to the view just as you did with the view for the first tab. When you are done, do not forget to save the view.
As with the previous Views, you have to create a new quick tab and link the View to it. The process is the same as for the previous two views, so you should already know how to do it.
Changing the tabs order
Once you link the view to the third tab, you might want to change the order in which the three tabs will appear. If that's your case, then you can reorder them by using the drag-and-drop feature to grab a tab and drag it to a different position.
As an example, drag the third tab - Most Viewed (week) - up and place it in the second position. Do not forget to save the changes.
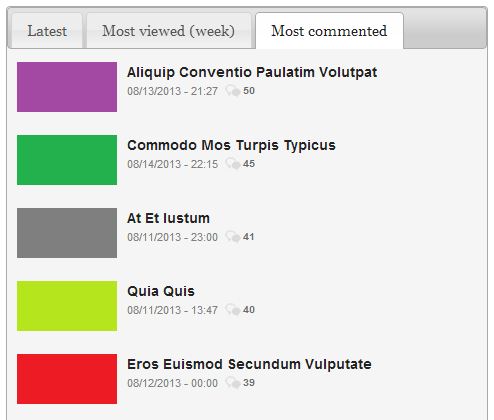
Lastly, and after applying some CSS magic, this is what you get:
The Quicktabs Style module provides a set of built-in styles you can apply to your tabbed content. If you want to use these built-in styles, you have to choose quicktabs as the Renderer to be used by the Quicktabs Instance.