PDD #8 - How to create your professional portfolio in Drupal 7 with Views Isotope - jQuery Isotope

This is the episode number 8 of the series Practical Drupal Development. In this episode I'm going to show you how to create your professional portfolio by using the Views Isotope module and the Isotope jQuery library.
The goal
One of your clients is a professional photographer who owns a Blog powered by Drupal 7. You are asked for creating a page for displaying a collection of her most remarkable work, which can be dynamically filtered by the taxonomy terms used by the site.

Click on the images to enlarge them.
Requirements
In order to achieve the goal, I'm going to use the following modules in addition to the ones that are part of the core:
- Ctools (Chaos Tools)
- jQuery Update
- Libraries
- Nodequeue
- Views (Views, Views UI)
- Views Isotope
In addition I'm going to use the Devel module plus lorempixel.com to generate dummy content and get some images for illustrating it.
A jQuery library named Isotope is required in order for the Portfolio to work. Download it from isotope.metafizzy.co; create a folder to be named jquery.isotope inside sites/all/libraries; put isotope.min.js into that directory location; and rename it to jquery.isotope.min.js
Before getting started
Before getting started, you must be aware that the Views Isotope module calls for HTML5. Because RDFa 1.0, which is the default version used by Drupal 7, doesn't work properly with HTML5, I'm going to disable the RDF module; I'm going to change the doctype declaration used by the Bartik theme by using a function (remember that the default doctype used by Drupal 7 is for XHTML 1.1 + RDFa 1.0); and I'm also going to edit the html.tpl.php template file in order to print the doctype and the <html> tag properly.
In order to use HTML5 along with RDFa, it's mandatory to use a valid doctype declaration for HTML5; it's obligatory to use RDFa 1.1; and it's also mandatory to get rid of RDFa namespaces (RDFa 1.1 doesn't rely on XML-specific namespace mechanism any longer).
/**
 * This function is for preprocessing variables used by html.tpl.php
 */
function mybartik_preprocess_html(&$vars) {

  $vars['doctype'] = "<!DOCTYPE html>\n";

  $vars['rdf_version'] = '';

  $vars['rdf_profile'] = '';

}
The right file to be edited in order to declare the previous function is named template.php.
Now you have to copy the html.tpl.php file (/modules/system/html.tpl.php) into the folder used by your theme to store template files. If there isn't any folder to do that, then create a new one named templates and copy the html.tpl.php file into it.
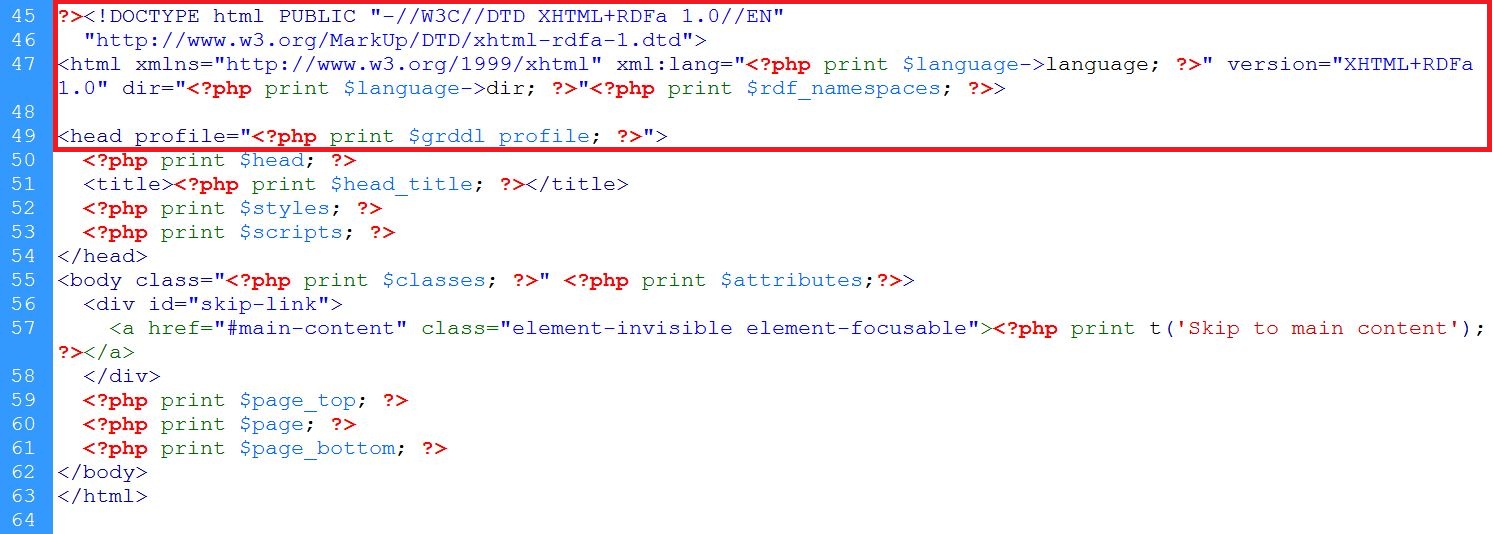
Replace the following piece of code:
<!DOCTYPE html PUBLIC "-//W3C//DTD XHTML+RDFa 1.0//EN"
  "http://www.w3.org/MarkUp/DTD/xhtml-rdfa-1.dtd">
<html xmlns="http://www.w3.org/1999/xhtml" xml:lang="<?php print $language->language; ?>" version="XHTML+RDFa 1.0" dir="<?php print $language->dir; ?>"<?php print $rdf_namespaces; ?>>

<head profile="<?php print $grddl_profile; ?>">
with this one:
<?php print $doctype; ?>
<html lang="<?php print $language->language; ?>" dir="<?php print $language->dir; ?>"<?php print $rdf_version . $rdf_namespaces; ?>>
<head<?php print $rdf_profile; ?>>
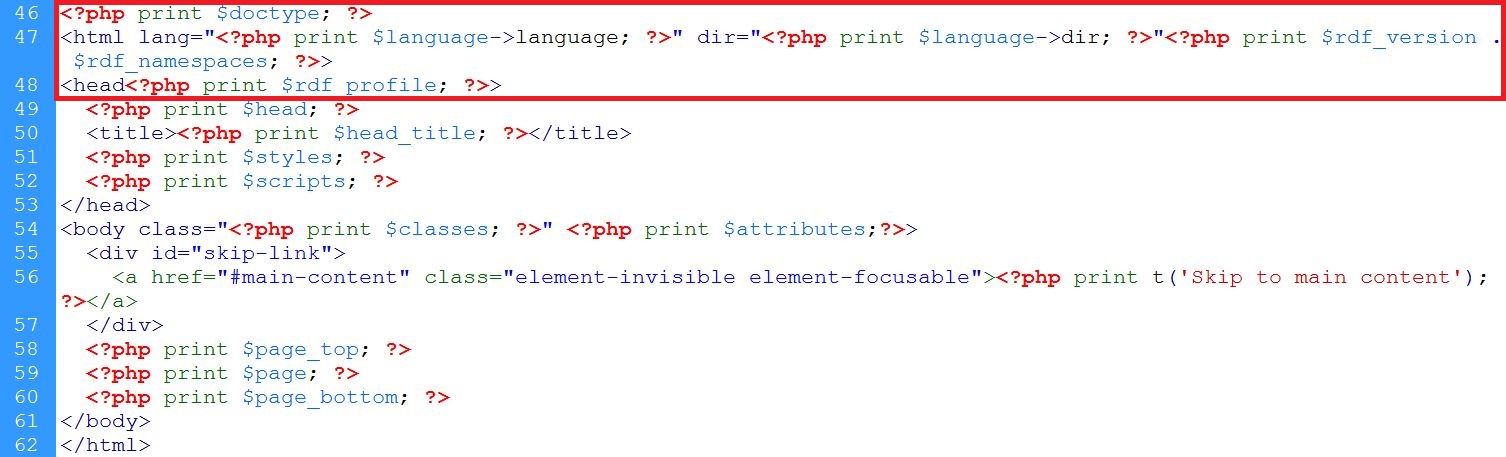
Now save all your changes and clear all caches. If everything is OK, this is what both the new doctype and the new <html> tag look like:

Getting started
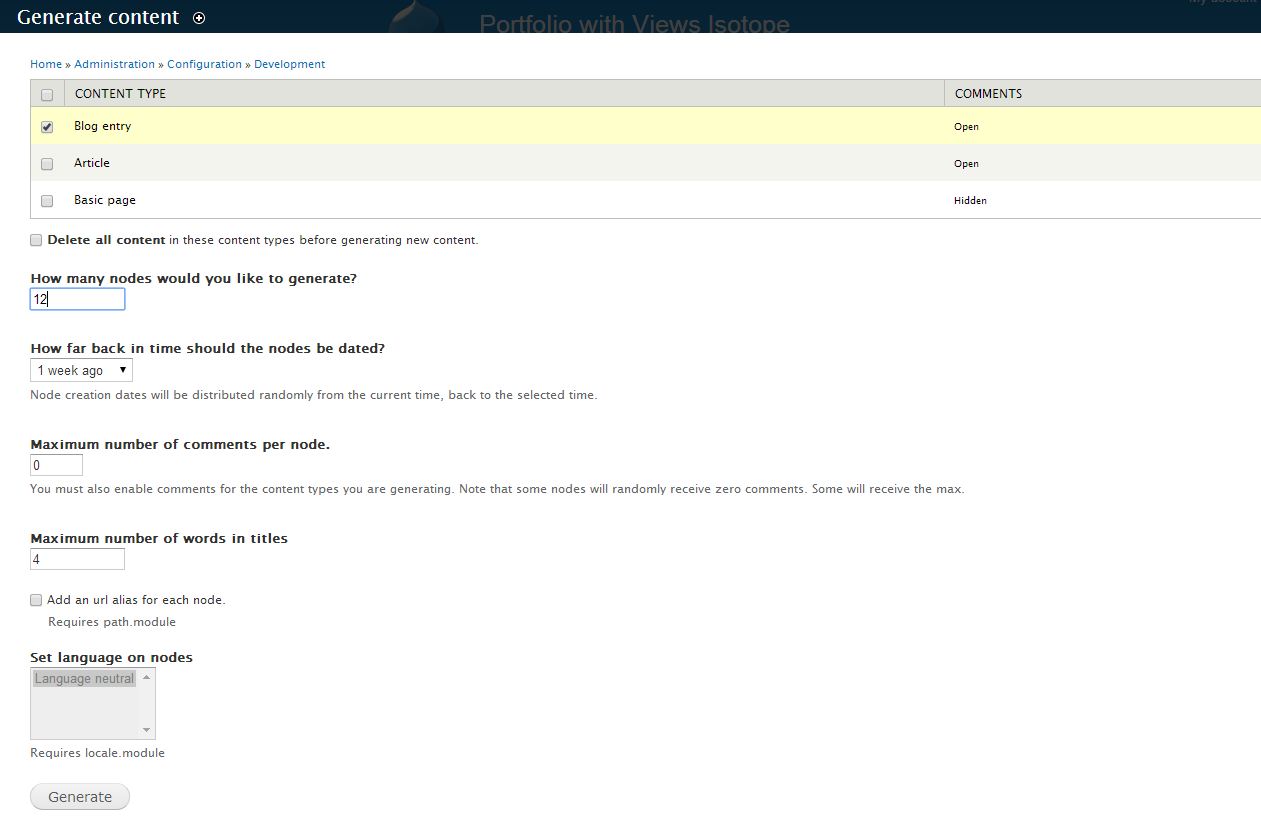
I'm going to get started by creating some dummy content with the help of the Devel module and lorempixel.com. This dummy content will be used later with the grid View.
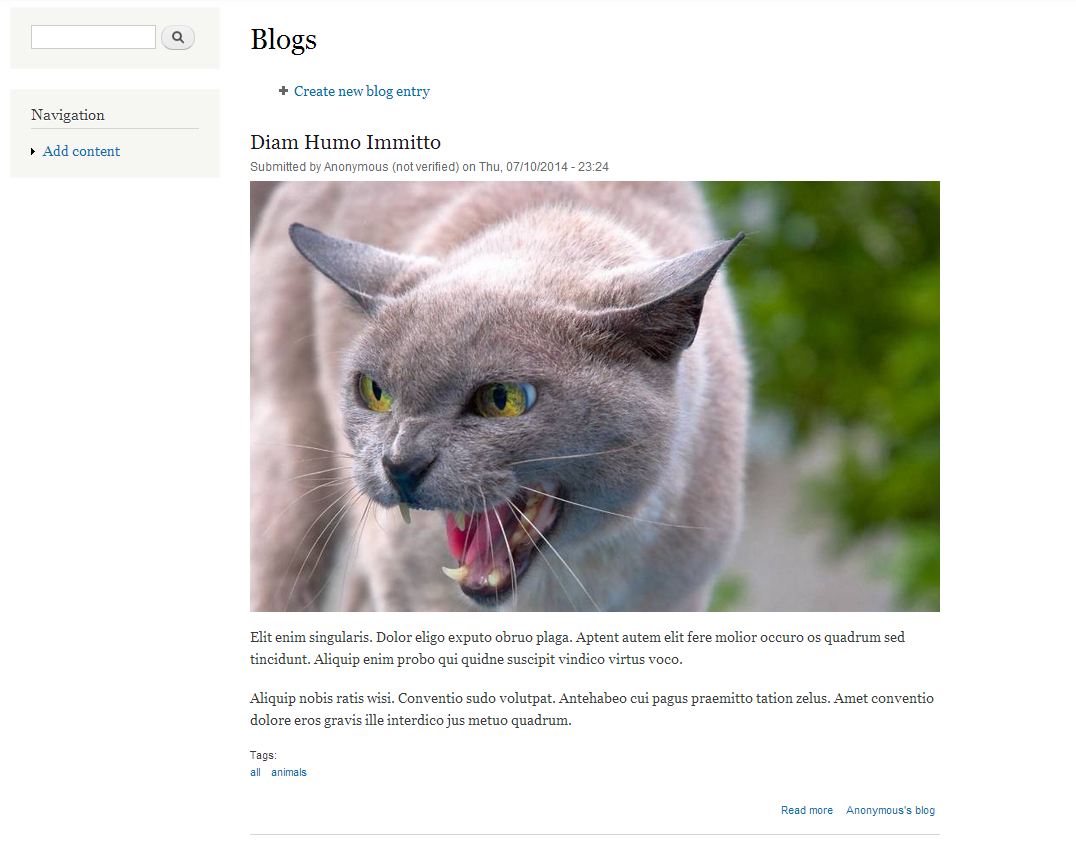
In order to be able to add images to the Blog type nodes, an image field has to be added to the Blog entry content type. Because of the fact that the image field created by default can be shared, I'm going to use it instead of creating a new one.
And it's the same for the reference field. This kind of field lets you group your nodes by using the taxonomy terms used by the site, as you'll soon see.
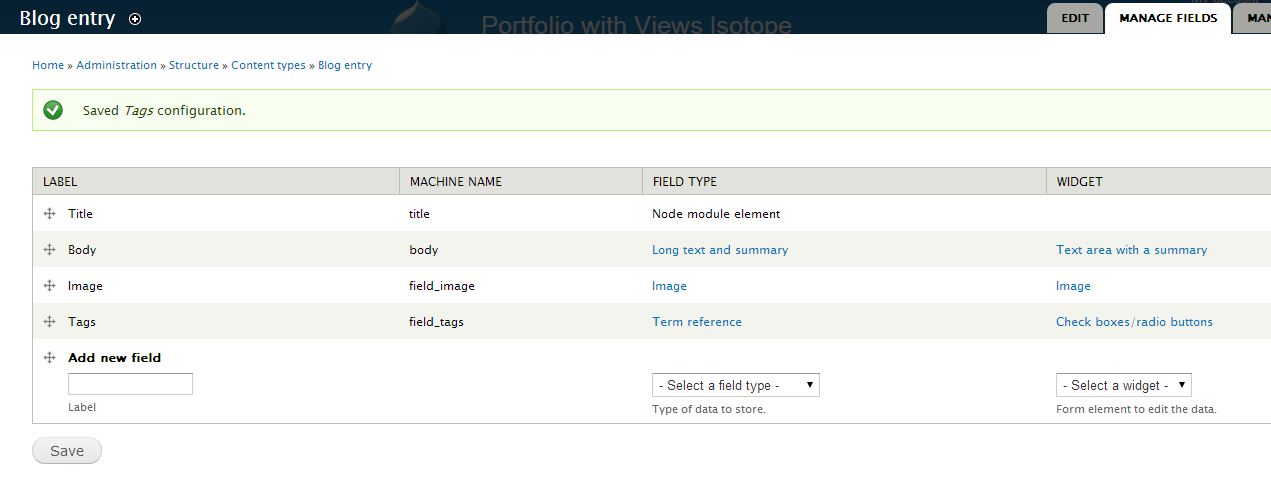
In addition, there are two settings, Enable Alt Field and Enable Title field, under Blog entry settings that you should consider when working with images. As you can read in the following image, the Alt attribute is of primary importance for Search Engines and Screen Readers.
To make things easier, I'm going to use both of them, but I'll leave empty their values.

Isotope filter block
Once the Blog entries are ready, I'm going to create a view for filtering the blog entries by using the taxonomy terms used by the site.
I've created five terms (all, abstract, animals, nature, and people) to be grouped into a vocabulary named Tags and then I've tagged every blog entry by using the term all to be able to display all the available work:
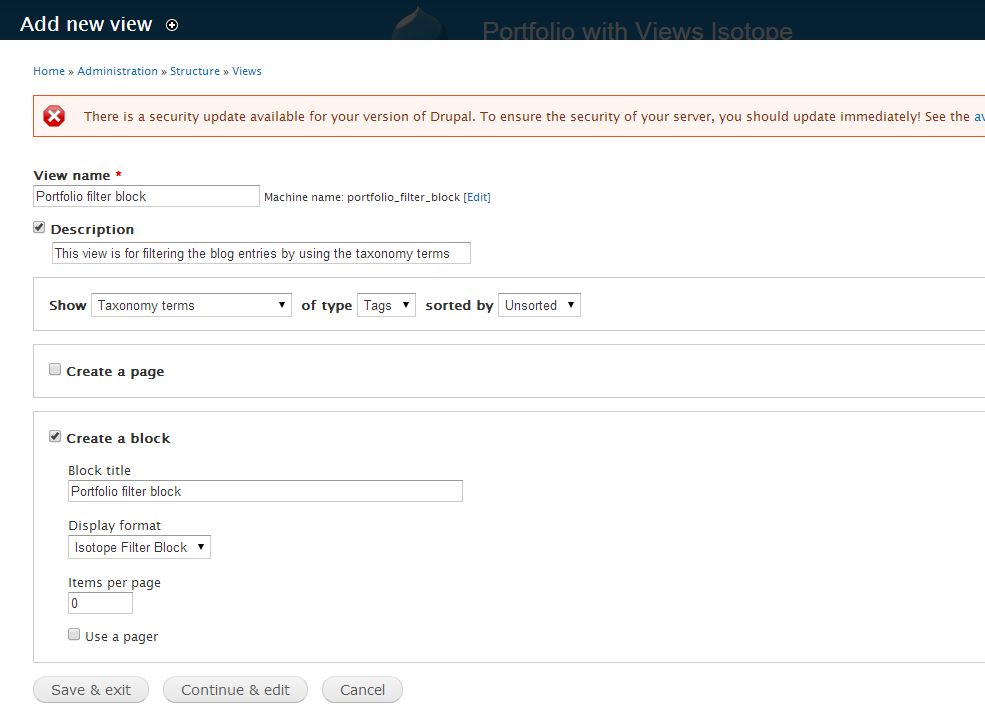
- View name: Isotope filter block
- Description (checked): This view is for filtering the blog entries by using the taxonomy terms
- Show: Taxonomy terms of type Tags sorted by Unsorted
- Create a page (unchecked)
- Create a block (checked)
- Block title: Isotope filter block
- Display format: Isotope filter Block
- Items per page: 0
- Use a pager (unchecked)
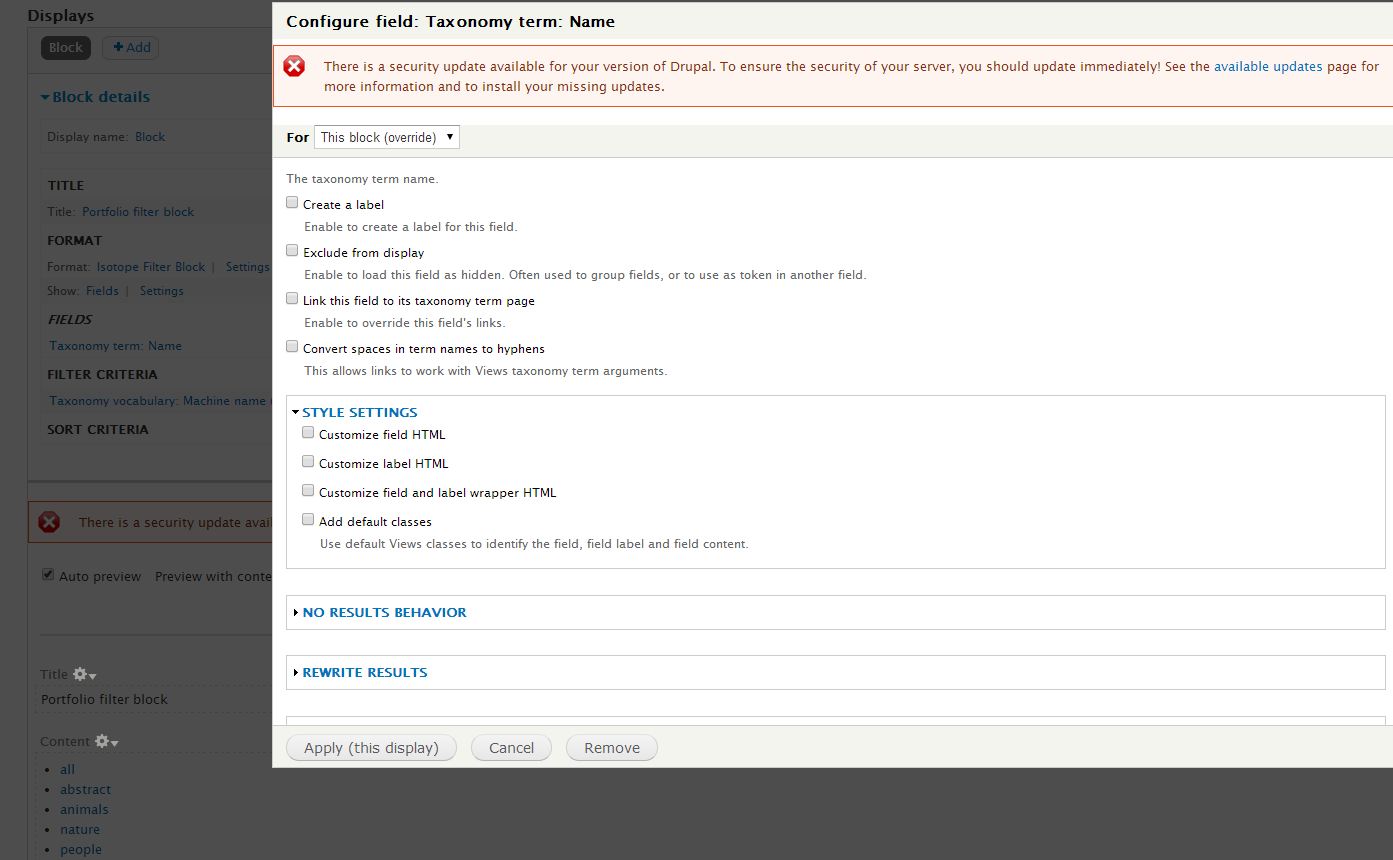
After clicking the Continue & Edit button, Drupal will show you a new form so that you can edit your view. Click on the Taxonomy term: Name link that falls under the Fields section and uncheck the following options: Link this field to its taxonomy term page and Add default classes. This view will be used as a header by the view I'm going to create next (don't forget to save your changes).
Isotope grid
This new view will display all the Blog entries related to the taxonomy terms I created at the beginning of this article. Because that's not what I'm after, I'm going to use the Nodequeue module in order to display just those Blog entries flagged as Favourites by the Blog owner:
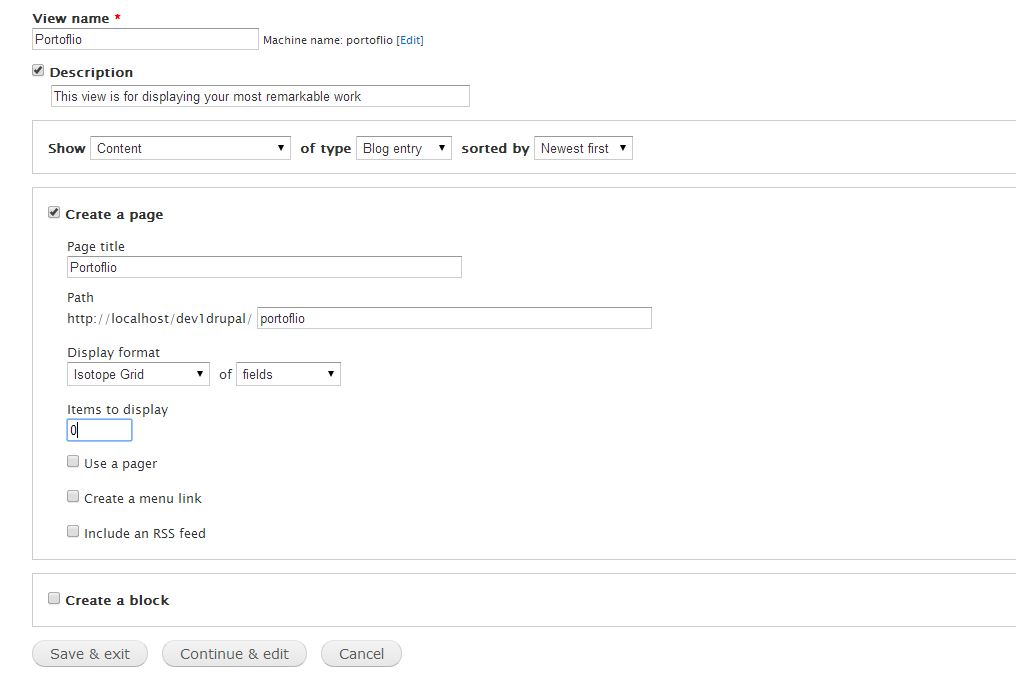
- View name: Portfolio
- Description (checked): This view is for displaying your most remarkable work
- Show: Content of type Blog entry sorted by Newest first
- Create a page (checked)
- Page title: Portfolio
- Path: (this is the URL of your portfolio)
- Display format: Isotope Grid _of_ fields
- Items to display: 0
- Use a pager (unchecked)
- Create a menu link (unchecked)
- Create an RSS feed(unchecked)
- Create a block (unchecked)
Once you click the Continue & Edit button, Drupal will show you a new form so that you can edit your view:
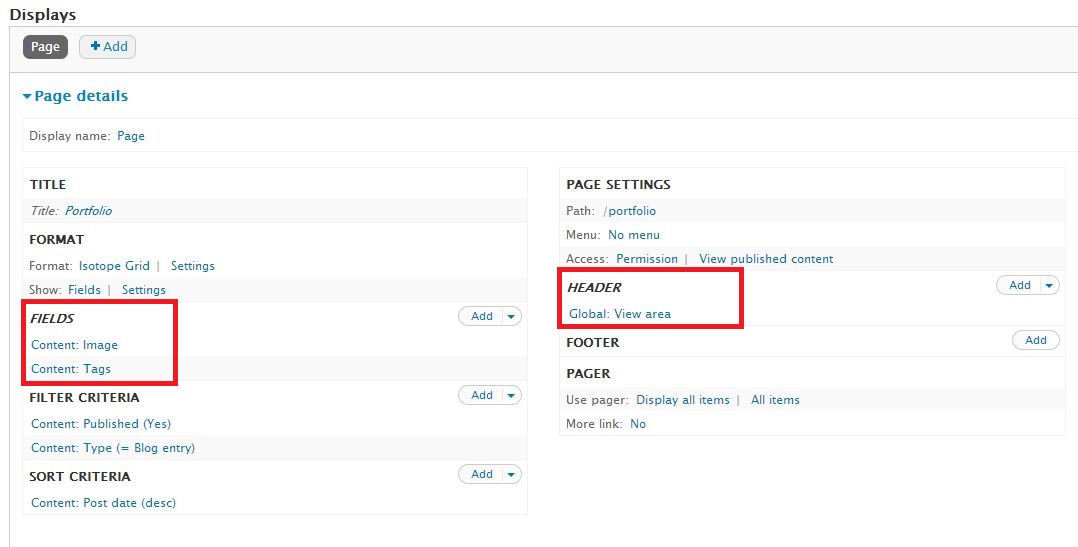
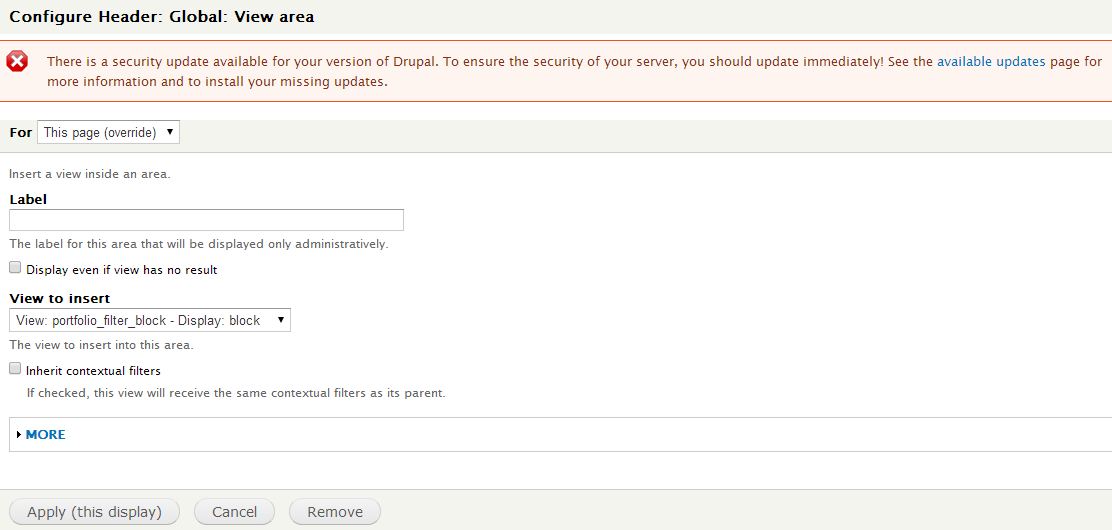
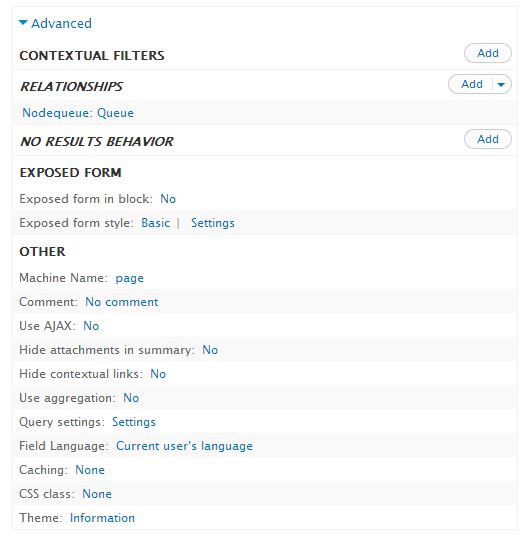
The first ingredient I'm going to add to this new view is the Isotope Filter Block view so that visitors are able to filter the photographs:
In addition, I'm going to add two fields to the Fields section. While the first one (Content: Image) is for displaying the photographs that illustrate the Blog entries, the second one (Content: Tags) is for filtering those entries. Note that the Content: Tags field has to be placed last in order for the View to work properly.
Let's look carefully at how you should set up this field:
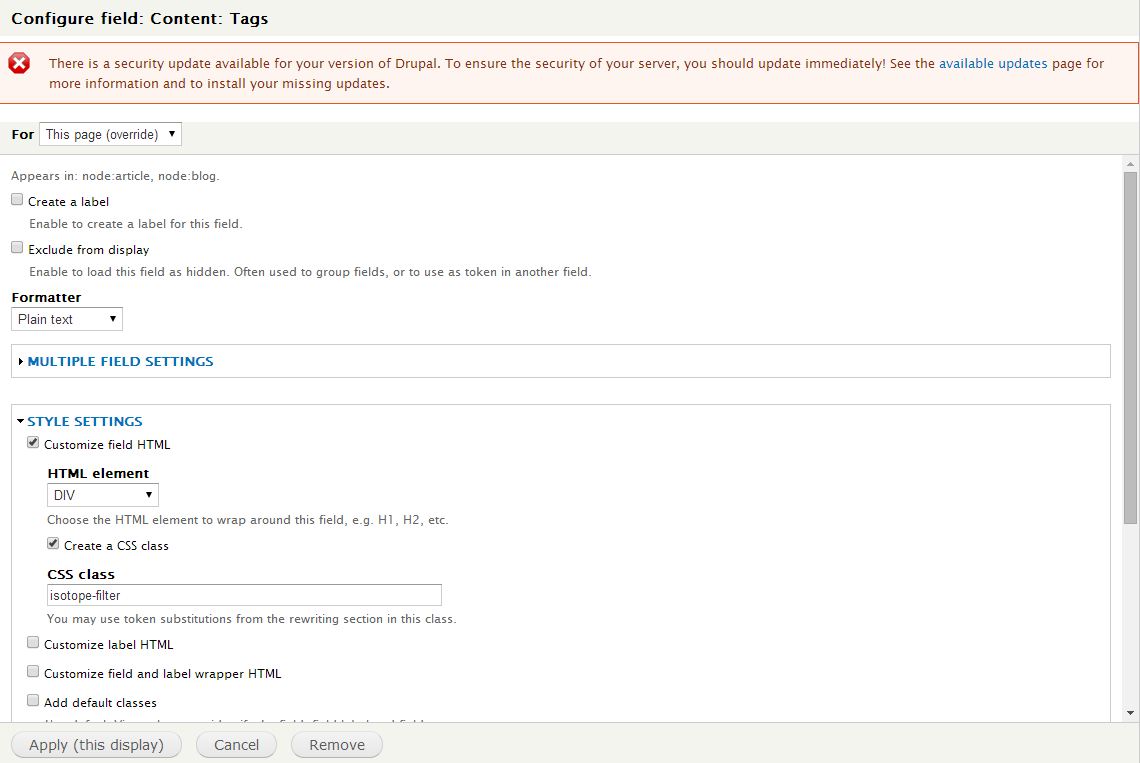
As you can see in the previous image, the Plain text option has to be selected as the formatter to be used by this field. In addition, under STYLE SETTINGS, the Customize field HTML option has to be checked and then the DIV value selected. This HTML element will be used as a container element. The Create a CSS class option has to be checked as well and isotope-filter is the right class name in order to filter the images properly.
If you checked how the Isotope Grid works at the moment, you'd soon realize that it doesn't work as expected. Due to the fact that there isn't a list of favourite Blog entries, your view is unable to display just the most remarkable photographs.
Now it's when the Nodequeue module comes into play. Since the Nodequeue module allows you to create an arbitrarily ordered list of nodes and given that it can be added to any view as a relationship, your view will be able to display just your client's most remarkable photographs.
Let's look at how to create a simple queue and add it to your view. Go to admin/structure/nodequeue and click on the Add simple queue link. Right after clicking the Add simple queue link, Drupal will show you a form that looks like this:
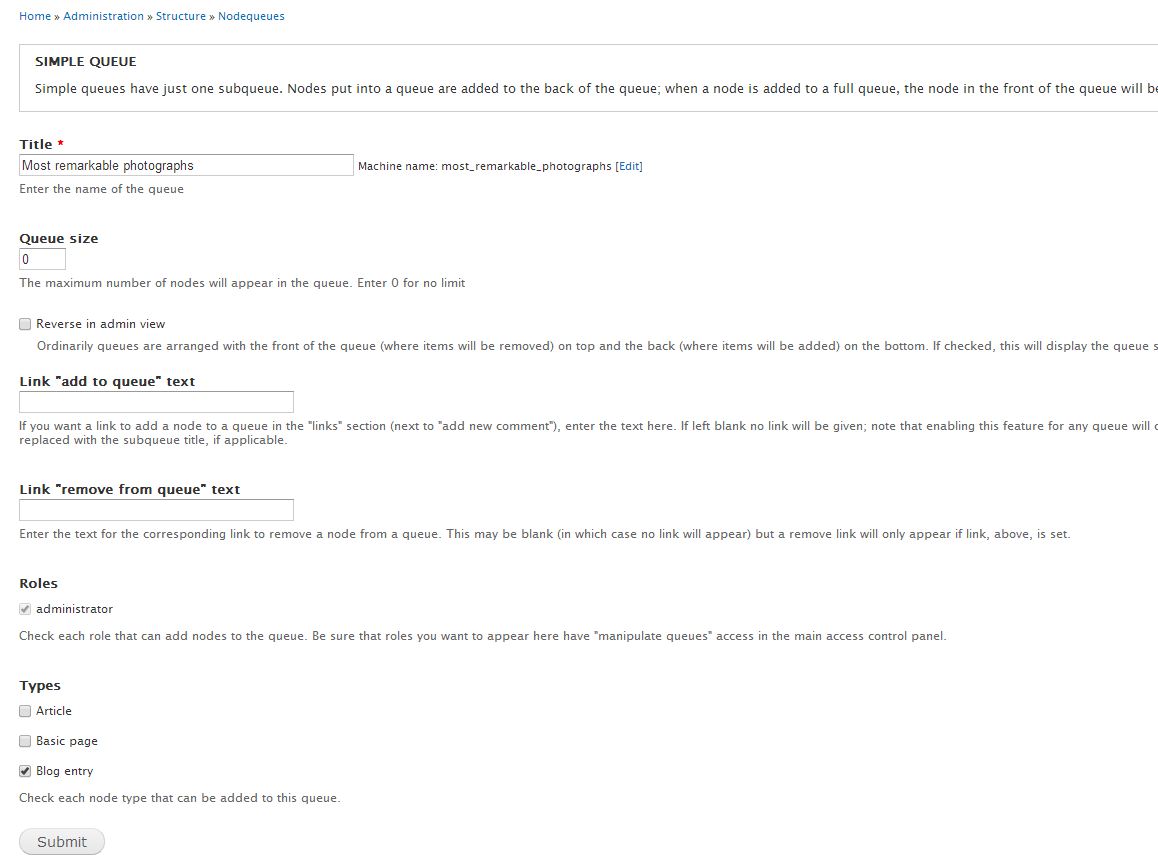
- Title: Most remarkable photographs
- Queue size: 0
- Roles: administrator
- Types: Blog entry
This form is for creating a simple queue to which you'll be adding your client's favourite blog entries (click on the Submit button when you're done to save your queue).
Now you have to add some nodes to your new queue. In order to do so, the Nodequeue module shows you a table with links to view, edit, and delete your queue. Click on the view link and add as many favourite blog entries to your queue as you like:


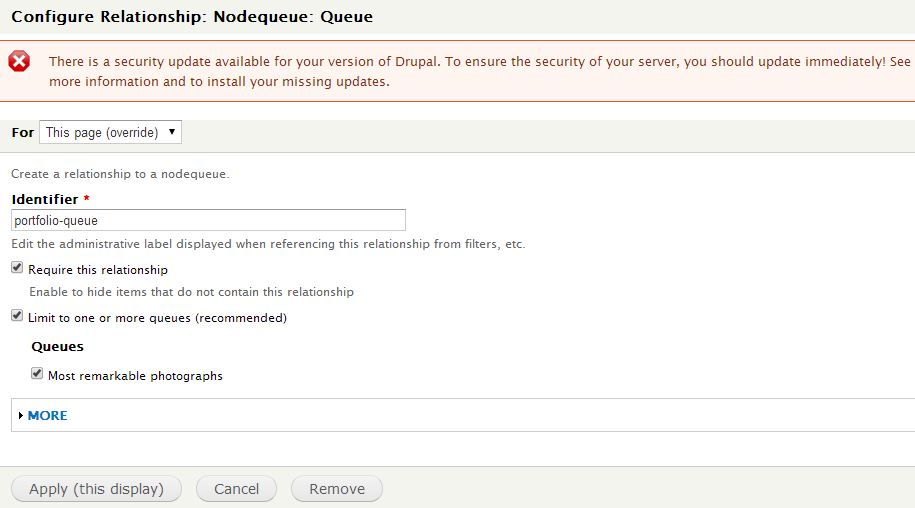
Once you're finished, you have to go back to your Portfolio view and create a relationship with the simple queue you just created:
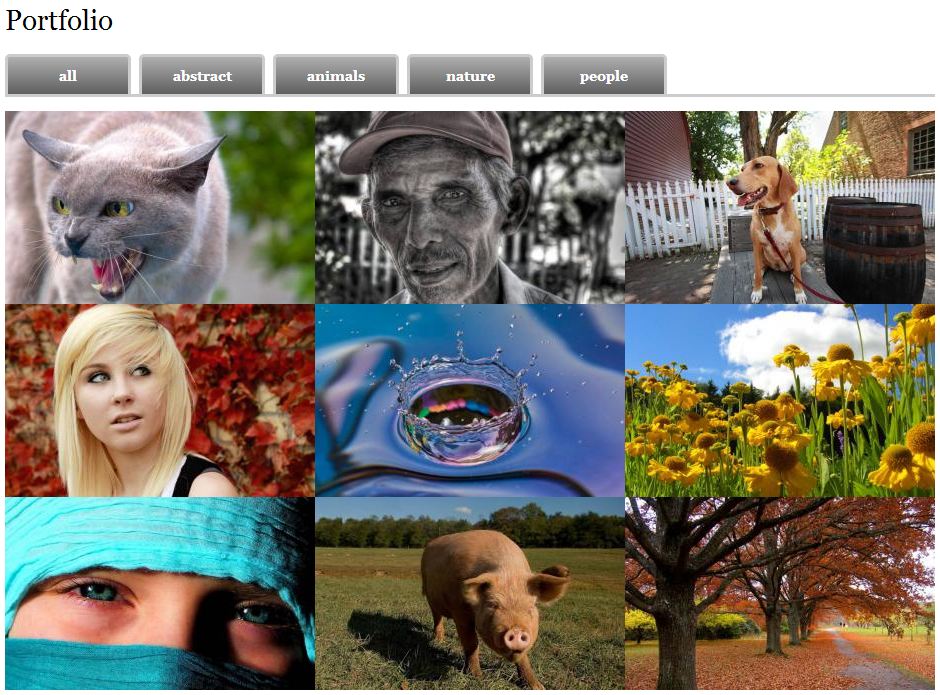
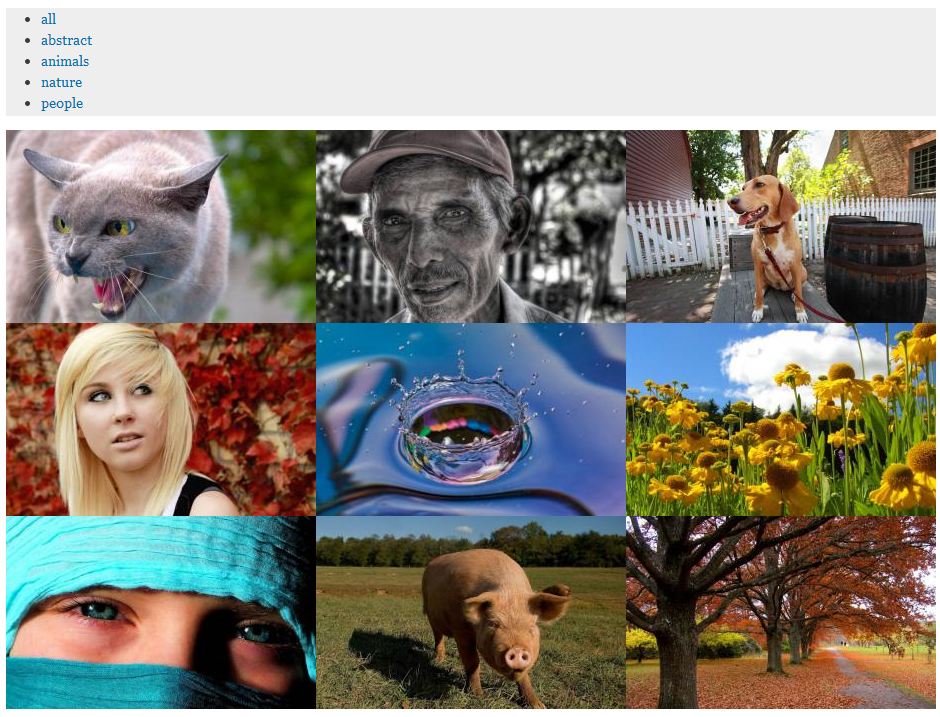
Once you're done, save your view and check out your Portfolio. It should look like this:
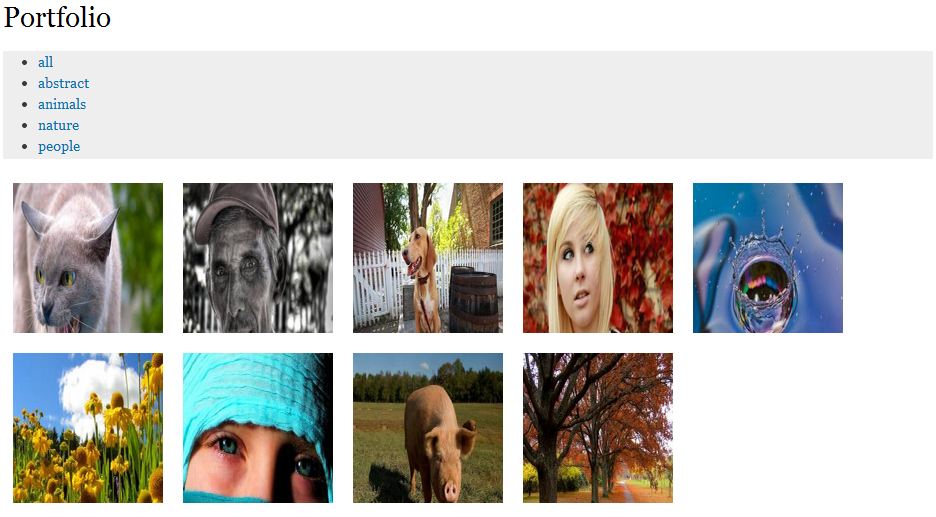
Even though the portfolio functions as it's expected to function, as you can see in the previous image, it looks awful! Don't worry, your portfolio will look great by the end of the next section!
As you can see in the previous image, there is a button to filter the photographs tagged as abstract, but there isn't any image related to that taxonomy term. This is because Drupal does not allow you to hide the taxonomy terms associated with any piece of content and this term was associated with three of the nodes created by the Devel module at the beginning of this article. As you can guess, those images are not displayed by the Portfolio because none of them was added to the simple queue you created above.
Making your portfolio look great
It's time to spruce your portfolio up! I'm going to start focusing on the Isotope Grid, since it's more laborious to format than the Isotope filter block. First, you have to initialize your Isotope instance by using JavaScript. The right file to do so is named view_isotope.js and it is at the same directory location as the module it belongs to (sites/all/modules/views_isotope).
For full details on how to customize this library, refer to isotope.metafizzy.co
Since Bartik is the theme used by this lab and given that it's not a responsive theme, I'm not going to use relative units to format the Isotope Grid. I'm going to create a 3-column portfolio that's 930 pixels wide. In addition, all the images will be displayed one next to each other with no margin among them. In order to do so, you have to create an image style that should be 310 pixels wide (the height will be set to 193px to maintain the aspect ratio).

After adding your layout mode options to the view_isotope.js file, some of the properties related to the following CSS selectors have to be overridden in order for your portfolio to meet your needs:
.isotope-element {
  height: 193px;
  margin: 0;
  width: 310px;
}

.isotope-element img {
  margin: 0;
  width: 310px;
}
If everything is OK, your portfolio should look like this:
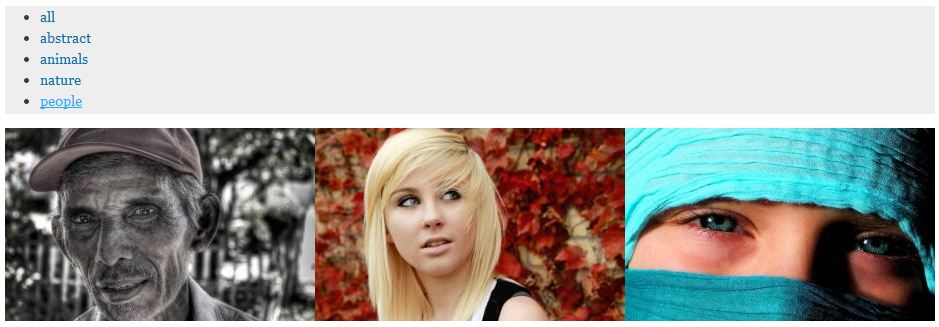
Now that the grid is complete, I'm finally going to apply the finishing touch to the Isotope filter block!
#isotope-options {
  background-color: white;
}

ul#filters {
  border-bottom: 3px solid rgb(204,204,204);
  list-style: none;
  margin-left:0;
  padding-bottom: 0;
  padding-left: 0;
}

ul#filters li {
  display: inline;
}

ul#filters li a {
  background-image: -webkit-linear-gradient(rgb(175,175,175), rgb(95,95,95));
  background-image: -moz-linear-gradient(rgb(175,175,175), rgb(95,95,95));
  background-image: -o-linear-gradient(rgb(175,175,175), rgb(95,95,95));
  background-image: linear-gradient(rgb(175,175,175), rgb(95,95,95));
  background-color: rgb(95,95,95);
  border: 3px solid rgb(204,204,204);
  border-bottom: none;
  border-radius: 5px 5px 0 0;
  color: white;
  display: inline-block;
  font-weight: bold;
  height: 1.25em;
  line-height: 1.25em;
  margin-right: 5px;
  padding: 10px;
  text-align: center;
  text-decoration: none;
  width: 100px;
}